Offline persistence with Vault on Android
In this tutorial we will walk through the essential steps of settings up Vault with your Android project. For that, we've open-sourced DroidStory, which is a simple app showcasing several best practices for integrating Vault in an Android project.
Getting started
Vault is split into two artifacts - compiler and runtime. The compiler is only required at compile time, and should not be bundled with the final APK. To achieve that, we first need to setup the android-apt Gradle plugin. The plugin not only lets us declare compile time only dependencies, but it also increases visibility for the generated classes inside IntelliJ/Android Studio.
First, we added the following to the dependencies block of our main build.gradle file:
classpath 'com.neenbedankt.gradle.plugins:android-apt:1.6'Next, we applied the plugin in the project's build.gradle file (right after the android plugin):
apply plugin: 'com.neenbedankt.android-apt'And last, we declared Vault's dependencies:
annotationProcessor 'com.contentful.vault:compiler:3.0.1'
annotationProcessor 'com.contentful.vault:core:3.0.1'
compile 'com.contentful.vault:core:3.0.1'
Make sure you're using the latest version of Vault in your own projects, which is available on the official GitHub repository. Now that we have our dependencies ready to go, let's move over to the code.
Models, fields and space
The DroidStory space has a single content type, Story, which contains the following fields:
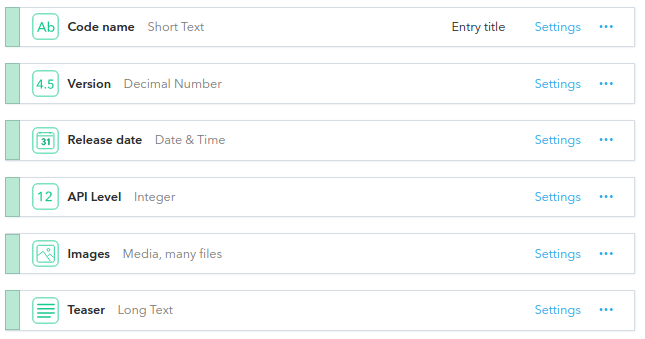
In order to create a Vault model corresponding to this type, we need to create a class that extends the Resource class. We use the @ContentType and @Field annotations from Vault to give the library hints about the relevant pieces. Let's look at Story.java as an example:
@ContentType("5RFNQmUj5Y6aAggqAswiqK")
public final class Story extends Resource {
@Field String codeName;
@Field Double version;
@Field String releaseDate;
@Field Integer apiLevel;
@Field List<Asset> images;
@Field String teaser;
// ... getters omitted for brevity.
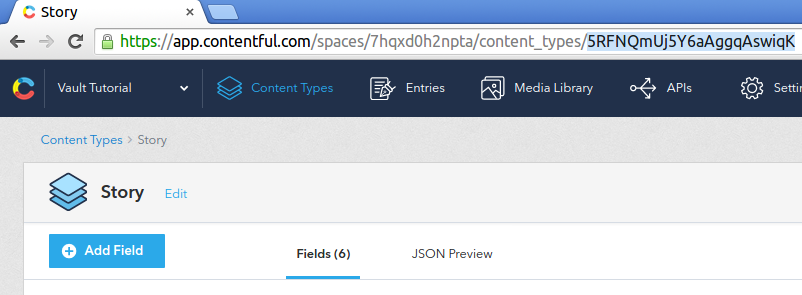
}Notice that long value 5RFNQmUj5Y6aAggqAswiqK? That's the ID of the Story content type. If you already know how to find it, move over to the next section. Otherwise, simply log-in to the Contentful web app, go to your content model, select the desired content type, and copy the last path segment of the URL.
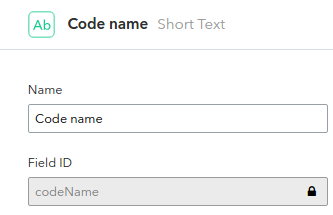
@Field elements are automatically mapped when the name of the variable matches the field ID, you can find the field ID with the web user-interface:
@Field elements can point to other resources, this is what we call links/references. Since the images field is a reference to many Media resources, we declare it as a List. Later when we use Vault to fetch these resources as objects, the links will be automatically resolved.
Now that our model is defined, we need to bundle it into a space, which is the glue that ties multiple models together. Here's the code for DroidStorySpace.java:
@Space(
    value = "7hqxd0h2npta",
    models = { Story.class },
    locales = { "en-US" }
)
public final class DroidStorySpace { }
A space is just an empty class, annotated with @Space. We provide it with:
value- ID of the space.models- Array of model classes.locales- Array of locales.
Generator.java
Alternatively, if you don't want to create those classes by hand, you could use the generator.java project. This project downloads the content-types specified in a given spaces and generates matching java classes for you.
To get the generator running, you have to retrieve its current jar file:
$ cd /tmp
$ curl 'https://repo1.maven.org/maven2/com/contentful/generator/generator/0.9.3/generator-0.9.3-jar-with-dependencies.jar' > generator.jar
Now that you have the generator downloaded, you need to call it with the following arguments:
--folder <arg>arg is the target folder to put the generated java sources into--package <arg>use arg to specify the package name of the generated classes--space <arg>use the space id given as arg (see above for details on how to get it)--token <arg>please supply a management access token here. (Find out more about your token)
The complete command will look like this (please provide your own space id and token, since we do not want to give them to the public):
$ java -jar generator.jar --folder /tmp/generated/ --package com.contentful.sample.model --space SPACE --token TOKENThis will result in the same classes as above, only with less manual labor.
Synchronization
Vault uses the Sync API to get delta updates for your spaces. This means that only new or updated content will be transferred whenever you trigger synchronization. It is up to you to decide when is the best time to do so. Here's how to trigger it:
// Get instance of Vault
Vault vault = Vault.with(context, DroidStorySpace.class);

// Create instance of CDAClient (use a singleton!)
CDAClient client = CDAClient.builder()
    .setSpace("space-id")
    .setToken("delivery-api-token")
    .build();

// Trigger sync
vault.requestSync(SyncConfig.builder().setClient(client).build());
In the DroidStory app, we use a retained fragment named StoryFragment.java. Since activities get destroyed and re-created through configuration changes (e.g. orientation), a retained fragment is one way of having data live through those events. A retained fragment's onCreate() method will be invoked only once, so we call requestSync() right there, ensuring the data will be refreshed whenever that screen shows up for the first time through the lifetime of a process. In addition, sync is trigged with a pull to refresh gesture inside StoryActivity.java.
There are several ways to get notified once sync is finished, you can use broadcasts, callbacks or RxJava observables. But who wants to deal with broadcasts/callbacks anyway? With RxJava:
Vault.observeSyncResults()
    .observeOn(AndroidSchedulers.mainThread())
    .subscribe(syncResult -> {
      // handle result
    });
Queries
Making a query is as simple as:
List<Story> stories = vault.fetch(Story.class).all();For every model class, there's a $Fields generated class, which can be used to refer to fields when making queries:
Story story = vault.fetch(Story.class)
    .where(Story$Fields.CODE_NAME + " = ?", "Lollipop")
    .first();
Order can be specified with the order() method:
List<Story> stories = vault.fetch(Story.class)
    .order(Story$Fields.API_LEVEL + " DESC")
    .all();
Note that the fetch() method is synchronous, and will perform IO on the calling thread. In order to offload this work to a background thread, and collect the result back on the main thread, we can use the built-in support for RxJava:
vault.observe(Story.class)
    .all()
    .subscribeOn(Schedulers.io())
    .observeOn(AndroidSchedulers.mainThread())
    .subscribe(story -> {
      // ...
    });
Using your own space
In the DroidStory repository you'll also find droidstory-spacecreator, a small Node.js tool that creates a copy of the DroidStory space. You can use the tool as follows:
Usage: index <src_space_id> <src_cda_token> <cma_token>

Options:

  -h, --help         output usage information
  -V, --version      output the version number
  -o, --org-id <id>  Target organization ID
Your management API token can be aquired through the CMA documentation website. Once you've obtained the token, execute the following:
node droidstory-spacecreator/index 7hqxd0h2npta 8534526702014a2680fffca1a35b1e0ce5d75a95c5e96464ac438c6c342ca37e YOUR-CMA-TOKENThe ID of the new space should be printed, like so:
All done
Space ID: xxxxxxxxxx
Access Token: xxxxxxxxx
Update the space ID in Config.java, and add your CDA access token to the config.xml file.
Next we need to invalidate the previous data, as it belongs to the old space. To do that we can either uninstall the app, or set the dbVersion number to 2 on the @Space annotation in DroidStorySpace.java. Doing so invalidates any pre-existing data and essentially re-creates the database the first time it is used.
Now that we're through with configuration, you can create new entries or update any existing ones in your copied DroidStory space. Use the pull to refresh gesture to re-sync, and watch as the content updates.
Conclusion
Hopefully by now you know how to:
- Setup Vault in an Android project.
- Define models.
- Create a space.
- Trigger synchronization on-demand.
- Observe synchronization results.
- Make queries and fetch resources from Vault's local storage.
Make sure to check out the complete source-code for DroidStory, which is available on GitHub.
If you have any questions or feedback, please feel free to drop us an email to support@contentful.com.
Next steps
Not what you’re looking for? Try our FAQ.