Custom roles and permissions
Note: Custom roles are an Enterprise only feature.
This document explains how to use custom roles and permissions – a feature that helps setting up different access to content for different groups of users. The document is divided further in four major topics:
- How Roles and Permissions work?
- How to manage roles from the Web App?
- How to manage roles programmatically?
- Example: one writer, one translator, one editor
Summary of roles
Before getting started, following is a summary of the four main roles:
- Admin - Can do everything, including work with entries, create and update content types, configure space settings and work with API keys.
- Editor - Can work with entries, has read-only permission to Content Types and Space Settings, does not have access to API keys.
- Author - Can do everything an editor can do except for deleting, (un)publishing, (un)archiving entries.
- Translator - Can only work in the assigned language, can't create, delete, (un)publish, (un)archive any entries.
Note: Developer and Freelance roles have been deprecated in the current product version and are only available on select legacy plans.
How roles and permissions work
Before setting up Roles and Permissions for your project, it's best to fully understand the core concepts behind them and be certain of your actions.
Scope
The access to content is managed separately and independently in each space: Jack can have full ownership of space A, but be just a proofreader in a space B.
Roles
First thing you need to do is to identify distinct roles specific to the project. These are roles that you would set up later. Different roles imply different level of access to content.
Here are some common examples of roles: writer, editor, translator, proofreader, photo editor.
Access rights
For each role you would set up access to content individually. This is done by specifying what the user is allowed and not allowed to do. The access is specified by:
- Action. The actions are:
- Read
- Create
- Edit
- Delete
- (Un)Publish
- (Un)Archive
- Entries. It's possible to enable opening only the content which the user has created themselves, and deny opening content created by other users. It is also possible to control access to specific entries.
- Content type. It's possible to give full access (everything allowed) to the content type "meal", but give zero access (can't even read) to the content type "drink".
The most important aspect is everything which is not explicitly allowed is denied. Here's an example: if you've enabled editing entries, but didn't enable reading them, then the user won't be able to open the entries. Even though it might feel counter-intuitive, this way of handling access rights helps preventing unsolicited access: when you set up everything explicitly, there is no chance of accidentally giving someone access to something they shouldn't have.
How to manage roles from the Web App
Creating a new role
- Select "Roles" from the "Settings" menu at the top of the screen (this menu is only available to space administrators).
- Find a role in the list that is similar to the role you'd like to create, click "...", and select "Duplicate role".
- On this new screen you can customize the rules that will apply to users who are assigned this role.
Modifying an existing role
- Select the "Roles" entry from the "Settings" menu at the top of the screen, find the role you wish to modify and click on its name.
- In this screen you can modify the roles permissions (simple check boxes such as "Can modify Content Types") as well as the roles policy (a list of rules that allow or deny various actions in various contexts).
- The rules are split into two lists: one that says what the user is allowed to do, and a list of "exceptions": things a user will not be allowed to do even if the first list says they can. Each one of these rules applies to either entries or assets, and is made up of 3 parts:
- An action which can be one of "Read", "Create", "Edit", "Delete", "Publish/ Unpublish", or "Archive/Unarchive".
- A scope: either all entities, or only those created by the user themselves.
- A content type such as "Post" or "Category".
- If the action part of a rule is "Edit", there are 2 additional parts to allow for creating very fine-grained rules:
- If the rule specifies a content type, it can be further narrowed to apply only to a specific field in that content type.
- A locale, to allow or deny users permission to edit content in certain languages.
Explanation of different actions
There are six actions that can be restricted:
- Read: can users view these content items at all?
Roles must be given explicit permission to read content items such as assets or entries. This means it's very possible to set up a role that is allowed to create or edit entries, but since they cannot read them, effectively won't be able to do anything. Items which a user does not have permission to read will be hidden in the entry list. When an entry the user can read contains a link to an item the user cannot read, they will be shown a warning the item either doesn't exist or can't be shown to them.
- Edit: can users change this content?
A user who cannot change content may still be able to see it, but in a read-only state. Editing can be restricted not only to content types, but also to individual fields or languages.
- Create: can users create new content?
This rule can be restricted to a particular content type, for example to allow users to create new posts but not new categories.
- Publish/Unpublish: can users publish or unpublish content?
- Archive/Unarchive: can users archive or unarchive this content?
- Delete: can users remove this content?
Note that Contentful requires content to be unpublished before deletion. This means a role that can delete content but not unpublish, can only remove drafts.
Removing a role
- Select the "Roles" entry from the "Settings" menu at the top of the screen (this menu is only available to space administrators).
- Find a role in the list that is similar to the role you'd like to create, click the "..." button and select "Delete role".
- If this role has been assigned to any users, it is required to select a new role for them. Keep in mind that the administrator role cannot be removed.
Assigning a role to a user
- Select the "Users" entry from the "Settings" menu at the top of the screen (this menu is only available to space administrators).
- Find the user you wish to assign a new role, click the "..." button and select "Change role".
- Select the new role you wish to assign the user to and confirm.
Note: it is possible to change your own role (and thus lose permissions to update roles any further). It is even possible make all users in a space non-administrators. If this happens and you wish to restore administrative privileges in the space, you can do so under your account settings.
How to manage roles programmatically
It is possible to create and manage roles programmatically with the Content Management API. To get started, refer the guide.
One writer, one translator, one editor: setting up a bilingual project with Contentful
Objective of this example is to create three different roles - editor, writer, and translator. Also, set up appropriate access controls for each of them.
- The editor is the only person on the team that can publish content and approve every bit of content before it becomes public.
- The writer can create content, but neither publish it nor delete it.
- The translator can edit the content in the language they translate to, but never modify the source.
The previously used emojis example is referenced in this case.
Prerequisites
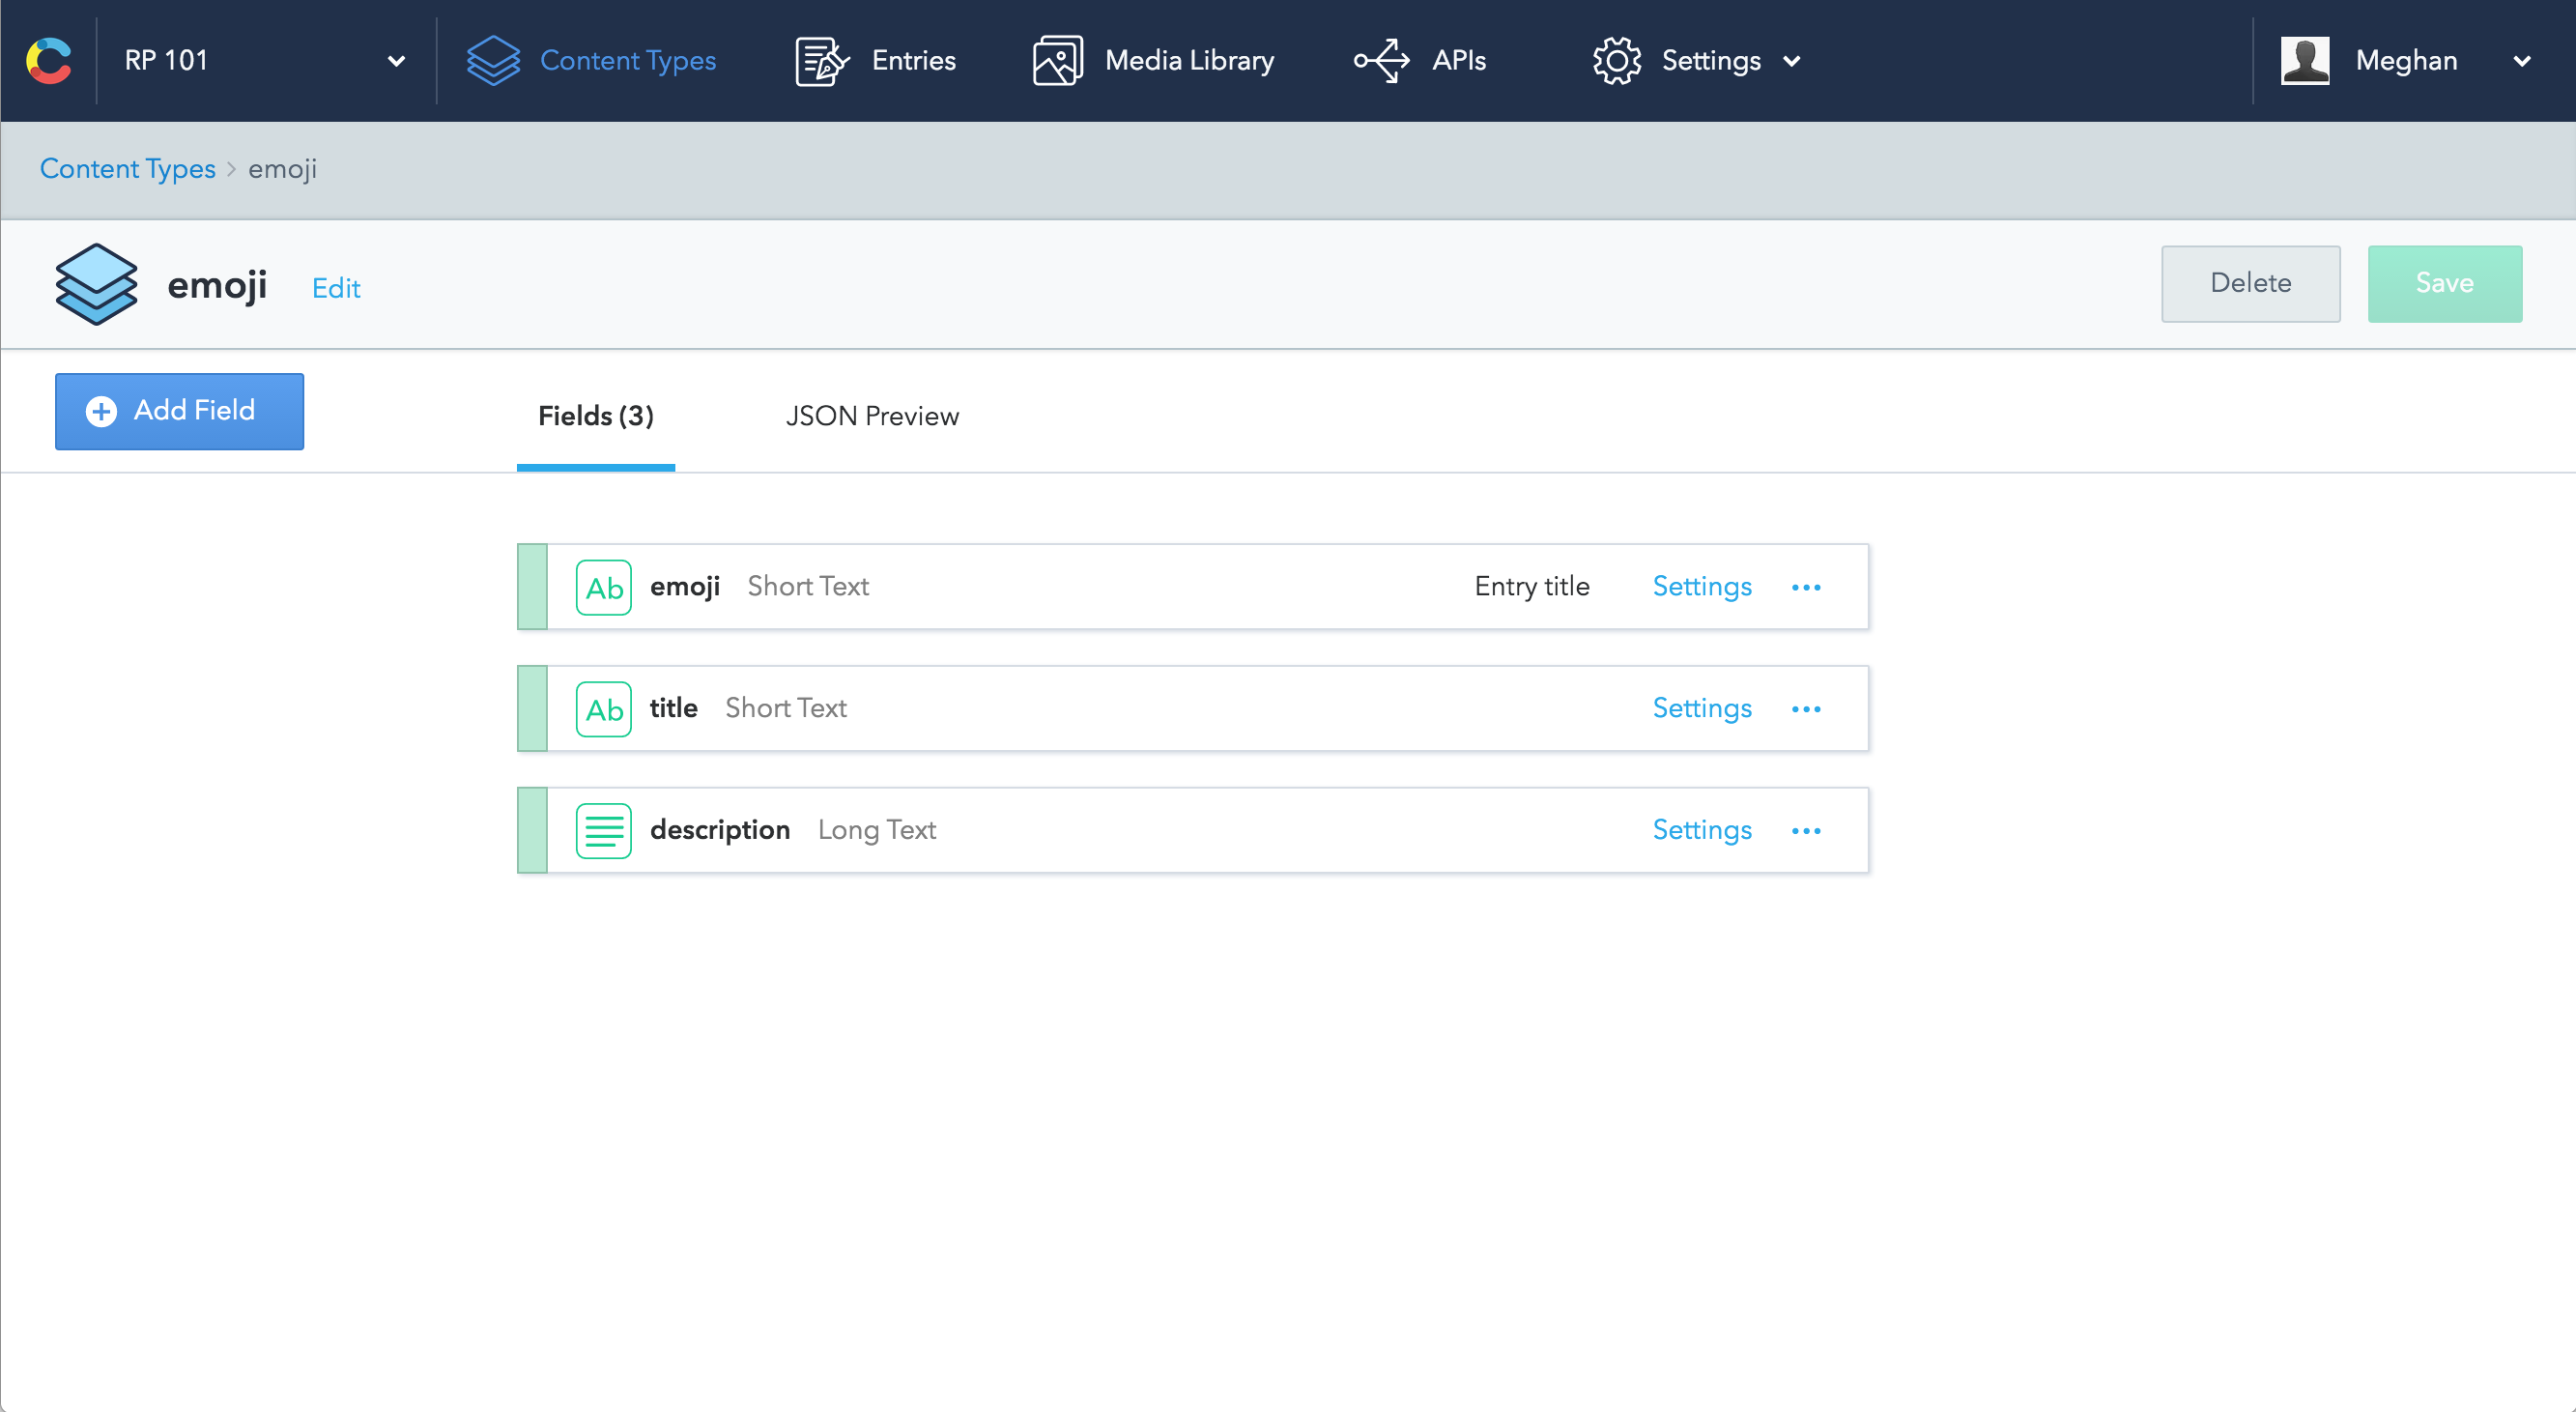
A space with at least one content type, and with localization enabled for at least one field. In the example emoji is the content type, and title and description are the translatable fields. Here's the entire content model:
Note: An Administrator or Owner of a space can manage roles and permissions.
Creating the roles
Click Settings at the top bar, and open Roles. This is where everything related to roles is set up.
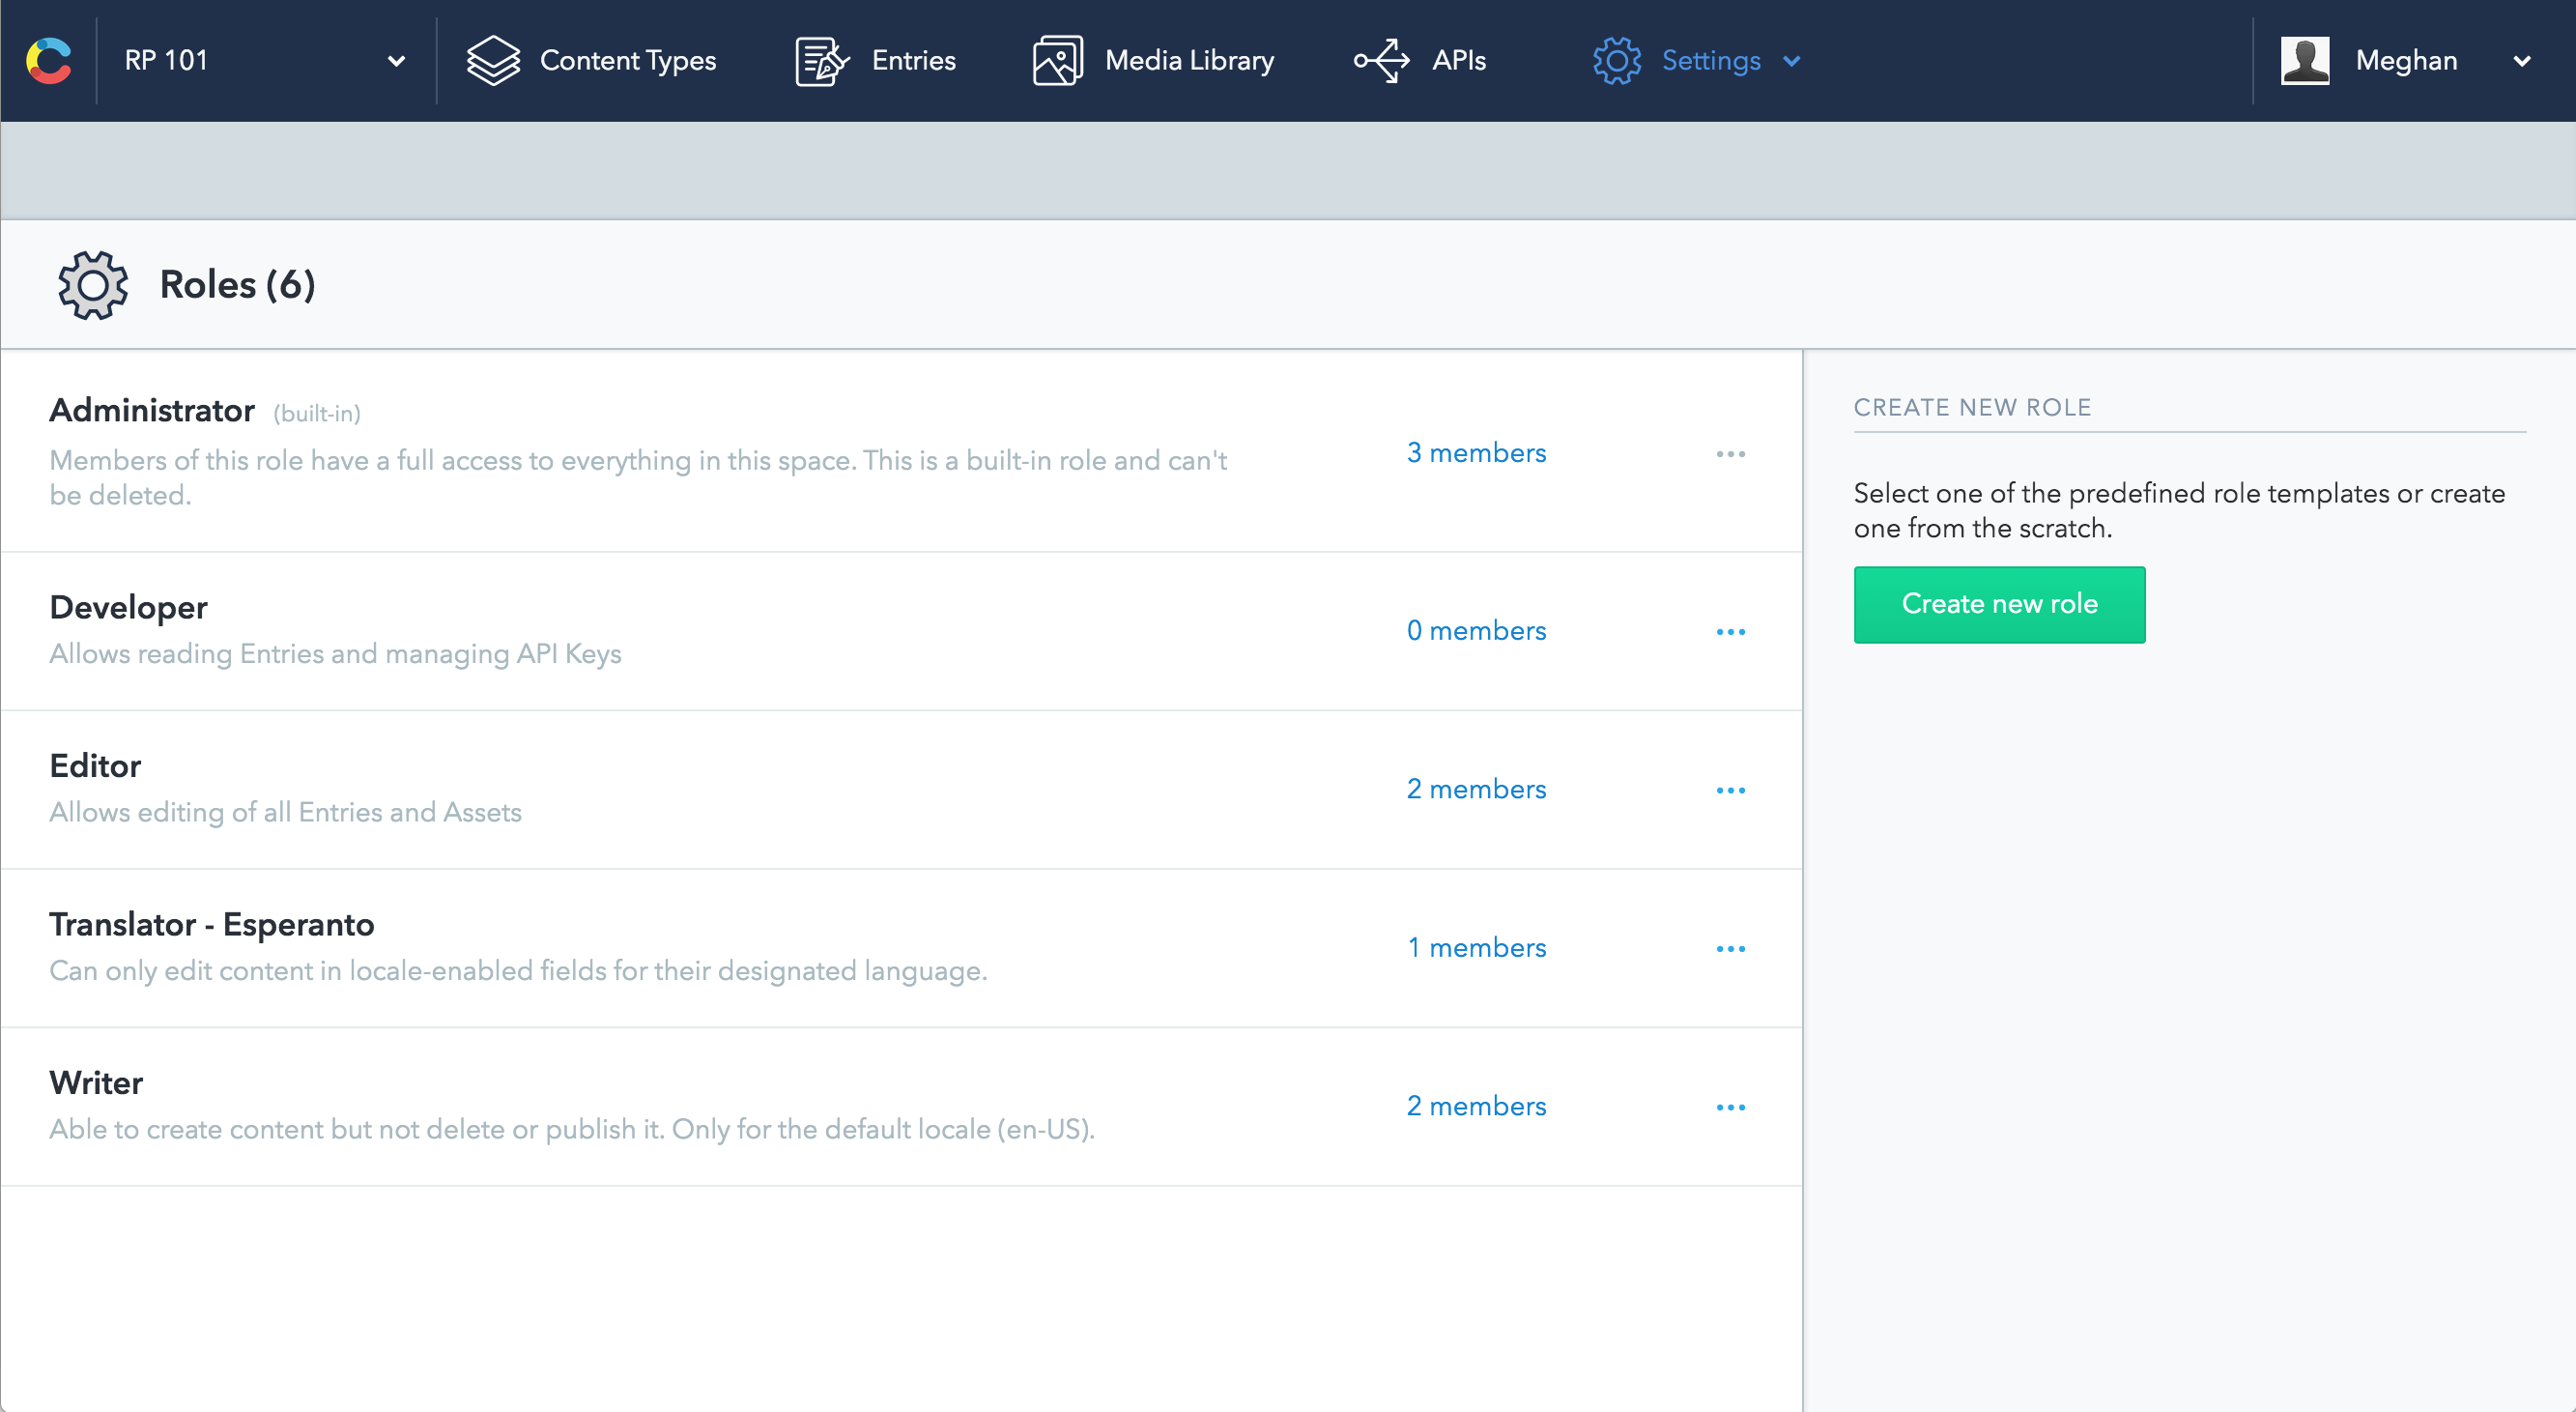
Administrator, Developer and Editor are the roles set up by default.
The Writer
Click Create new role on the right.
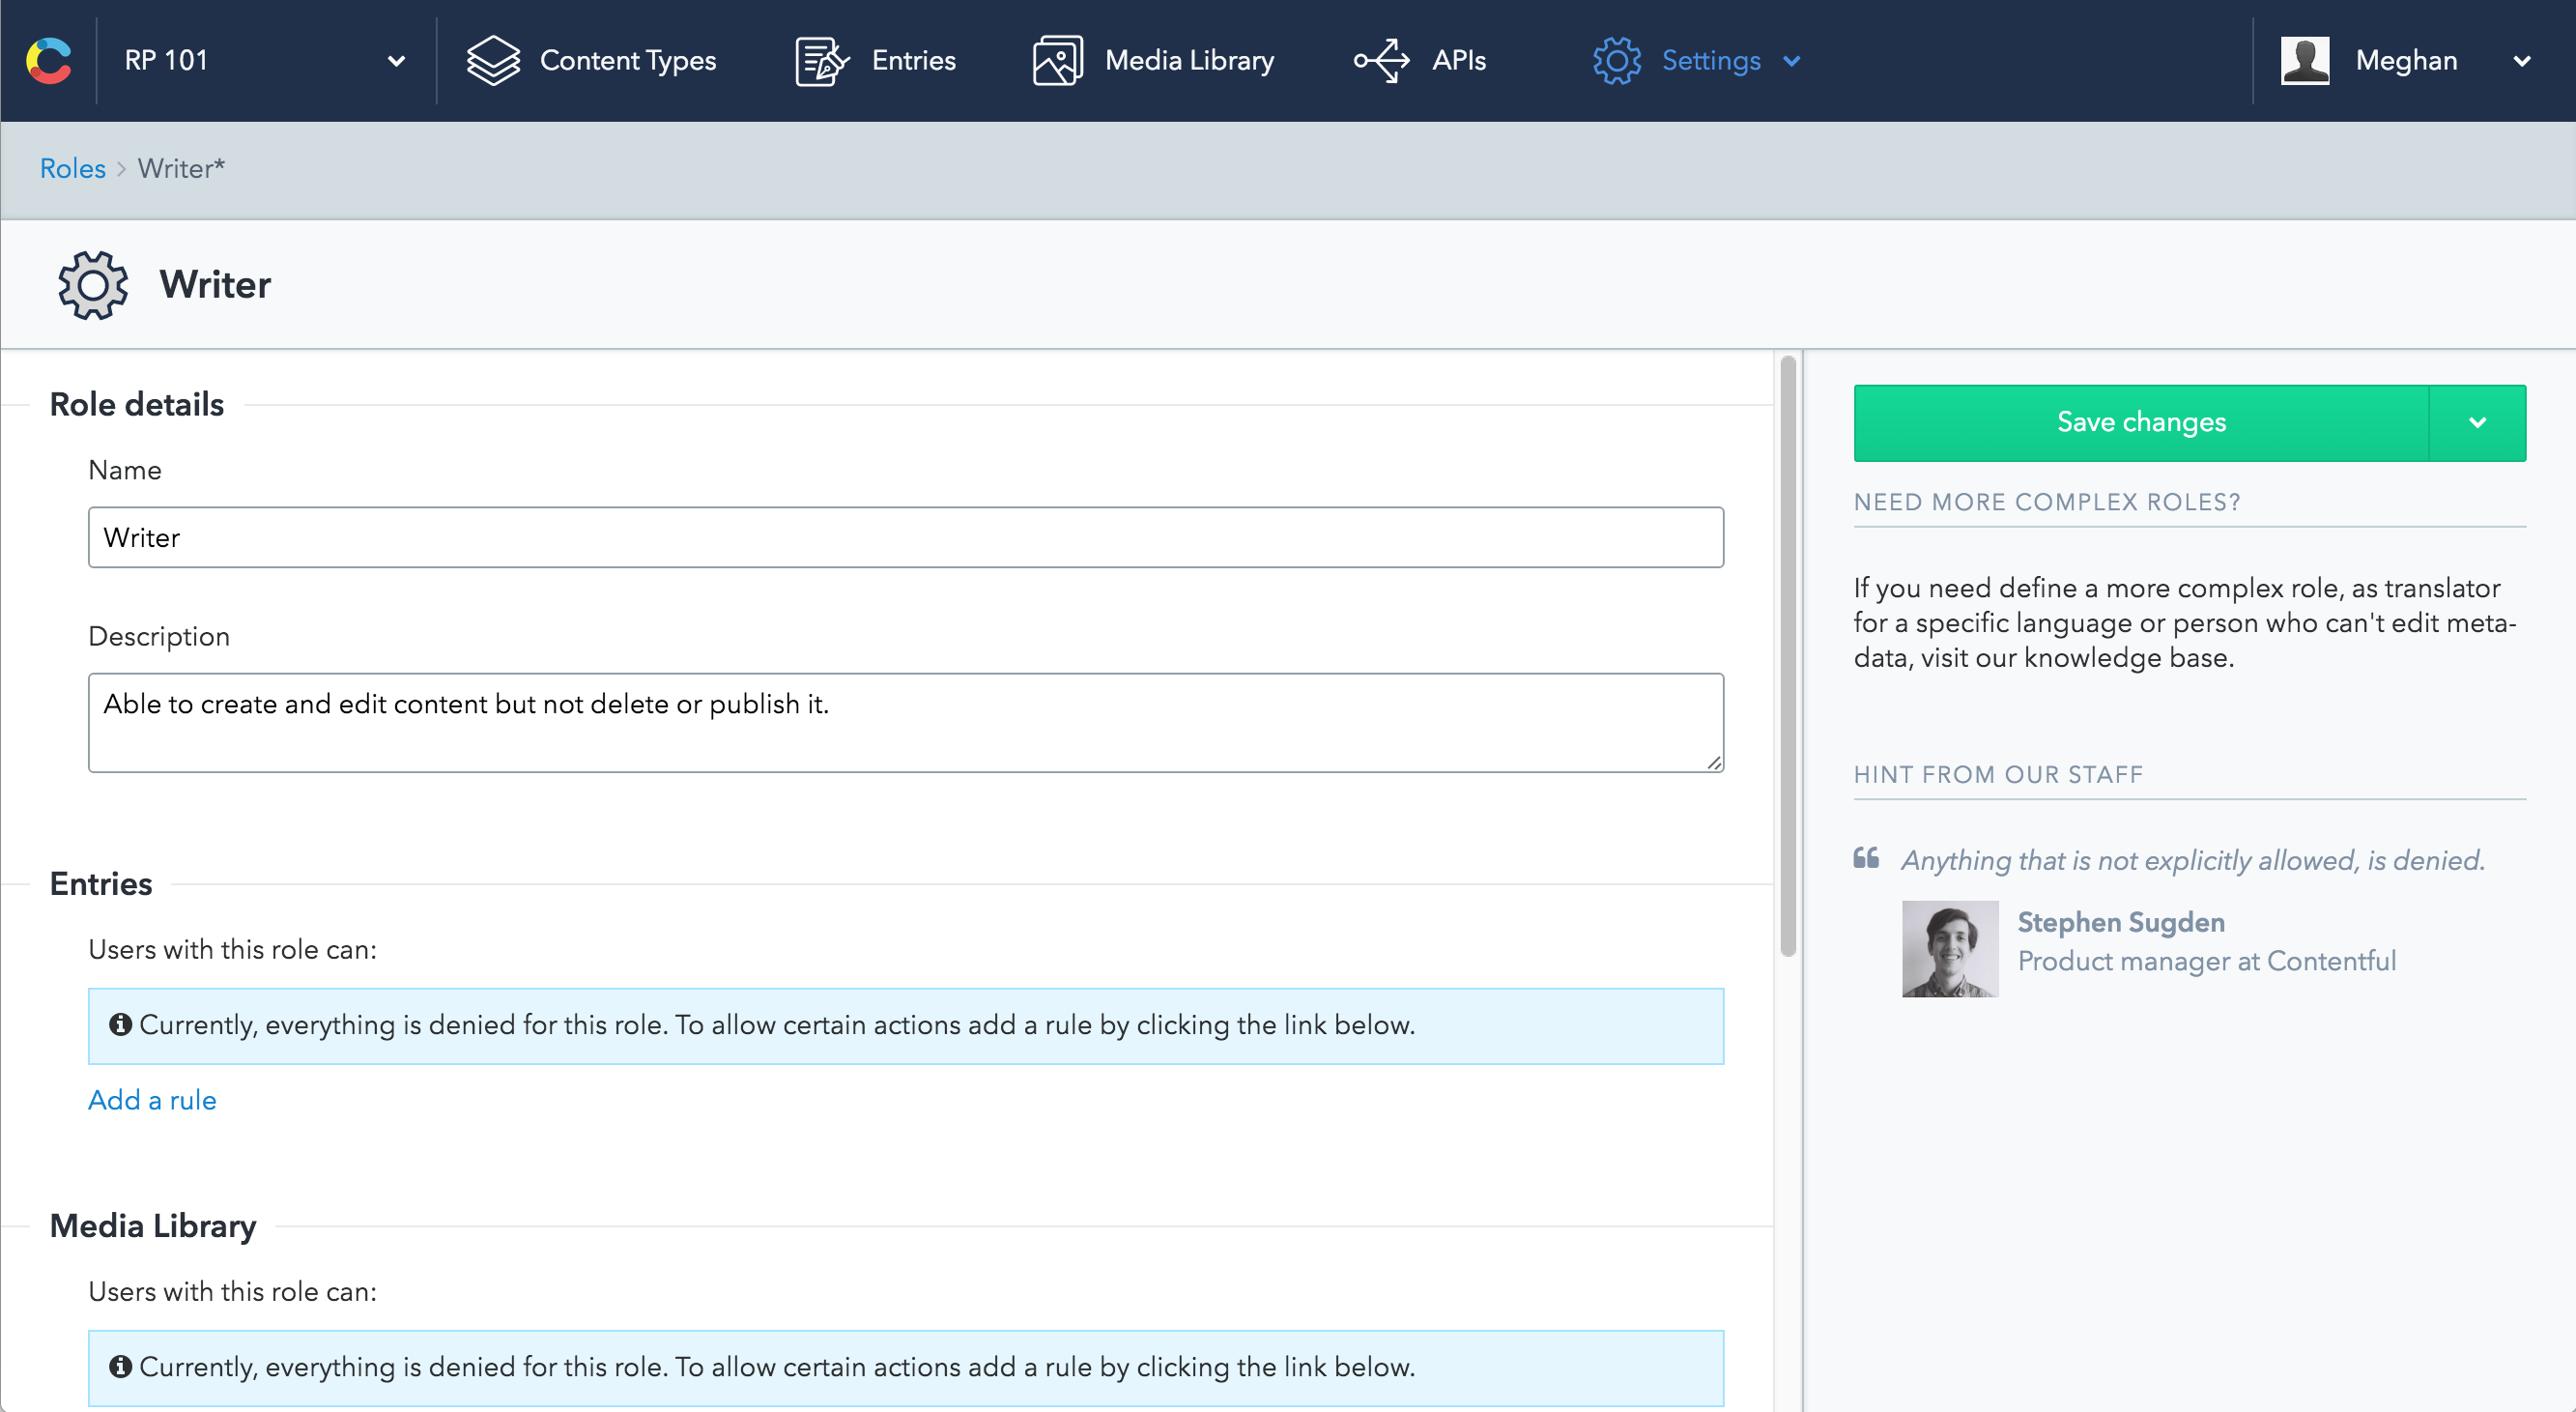
Add a Name and a brief Description for the role.
Click Add a rule corresponding to the relevant sub-sections( that are Entries, Media Library, Content Types, API keys and Space Settings). As the writer deals only with entries, Entries is the only relevant section.
There are three elements to each rule: the action(s), the owner, and the scope. Click on "All actions" to see all the available actions.

- Select "Create" from the list and leave the rest as they are. Repeat the same for "Edit" and "Read". This is what you should end up with:
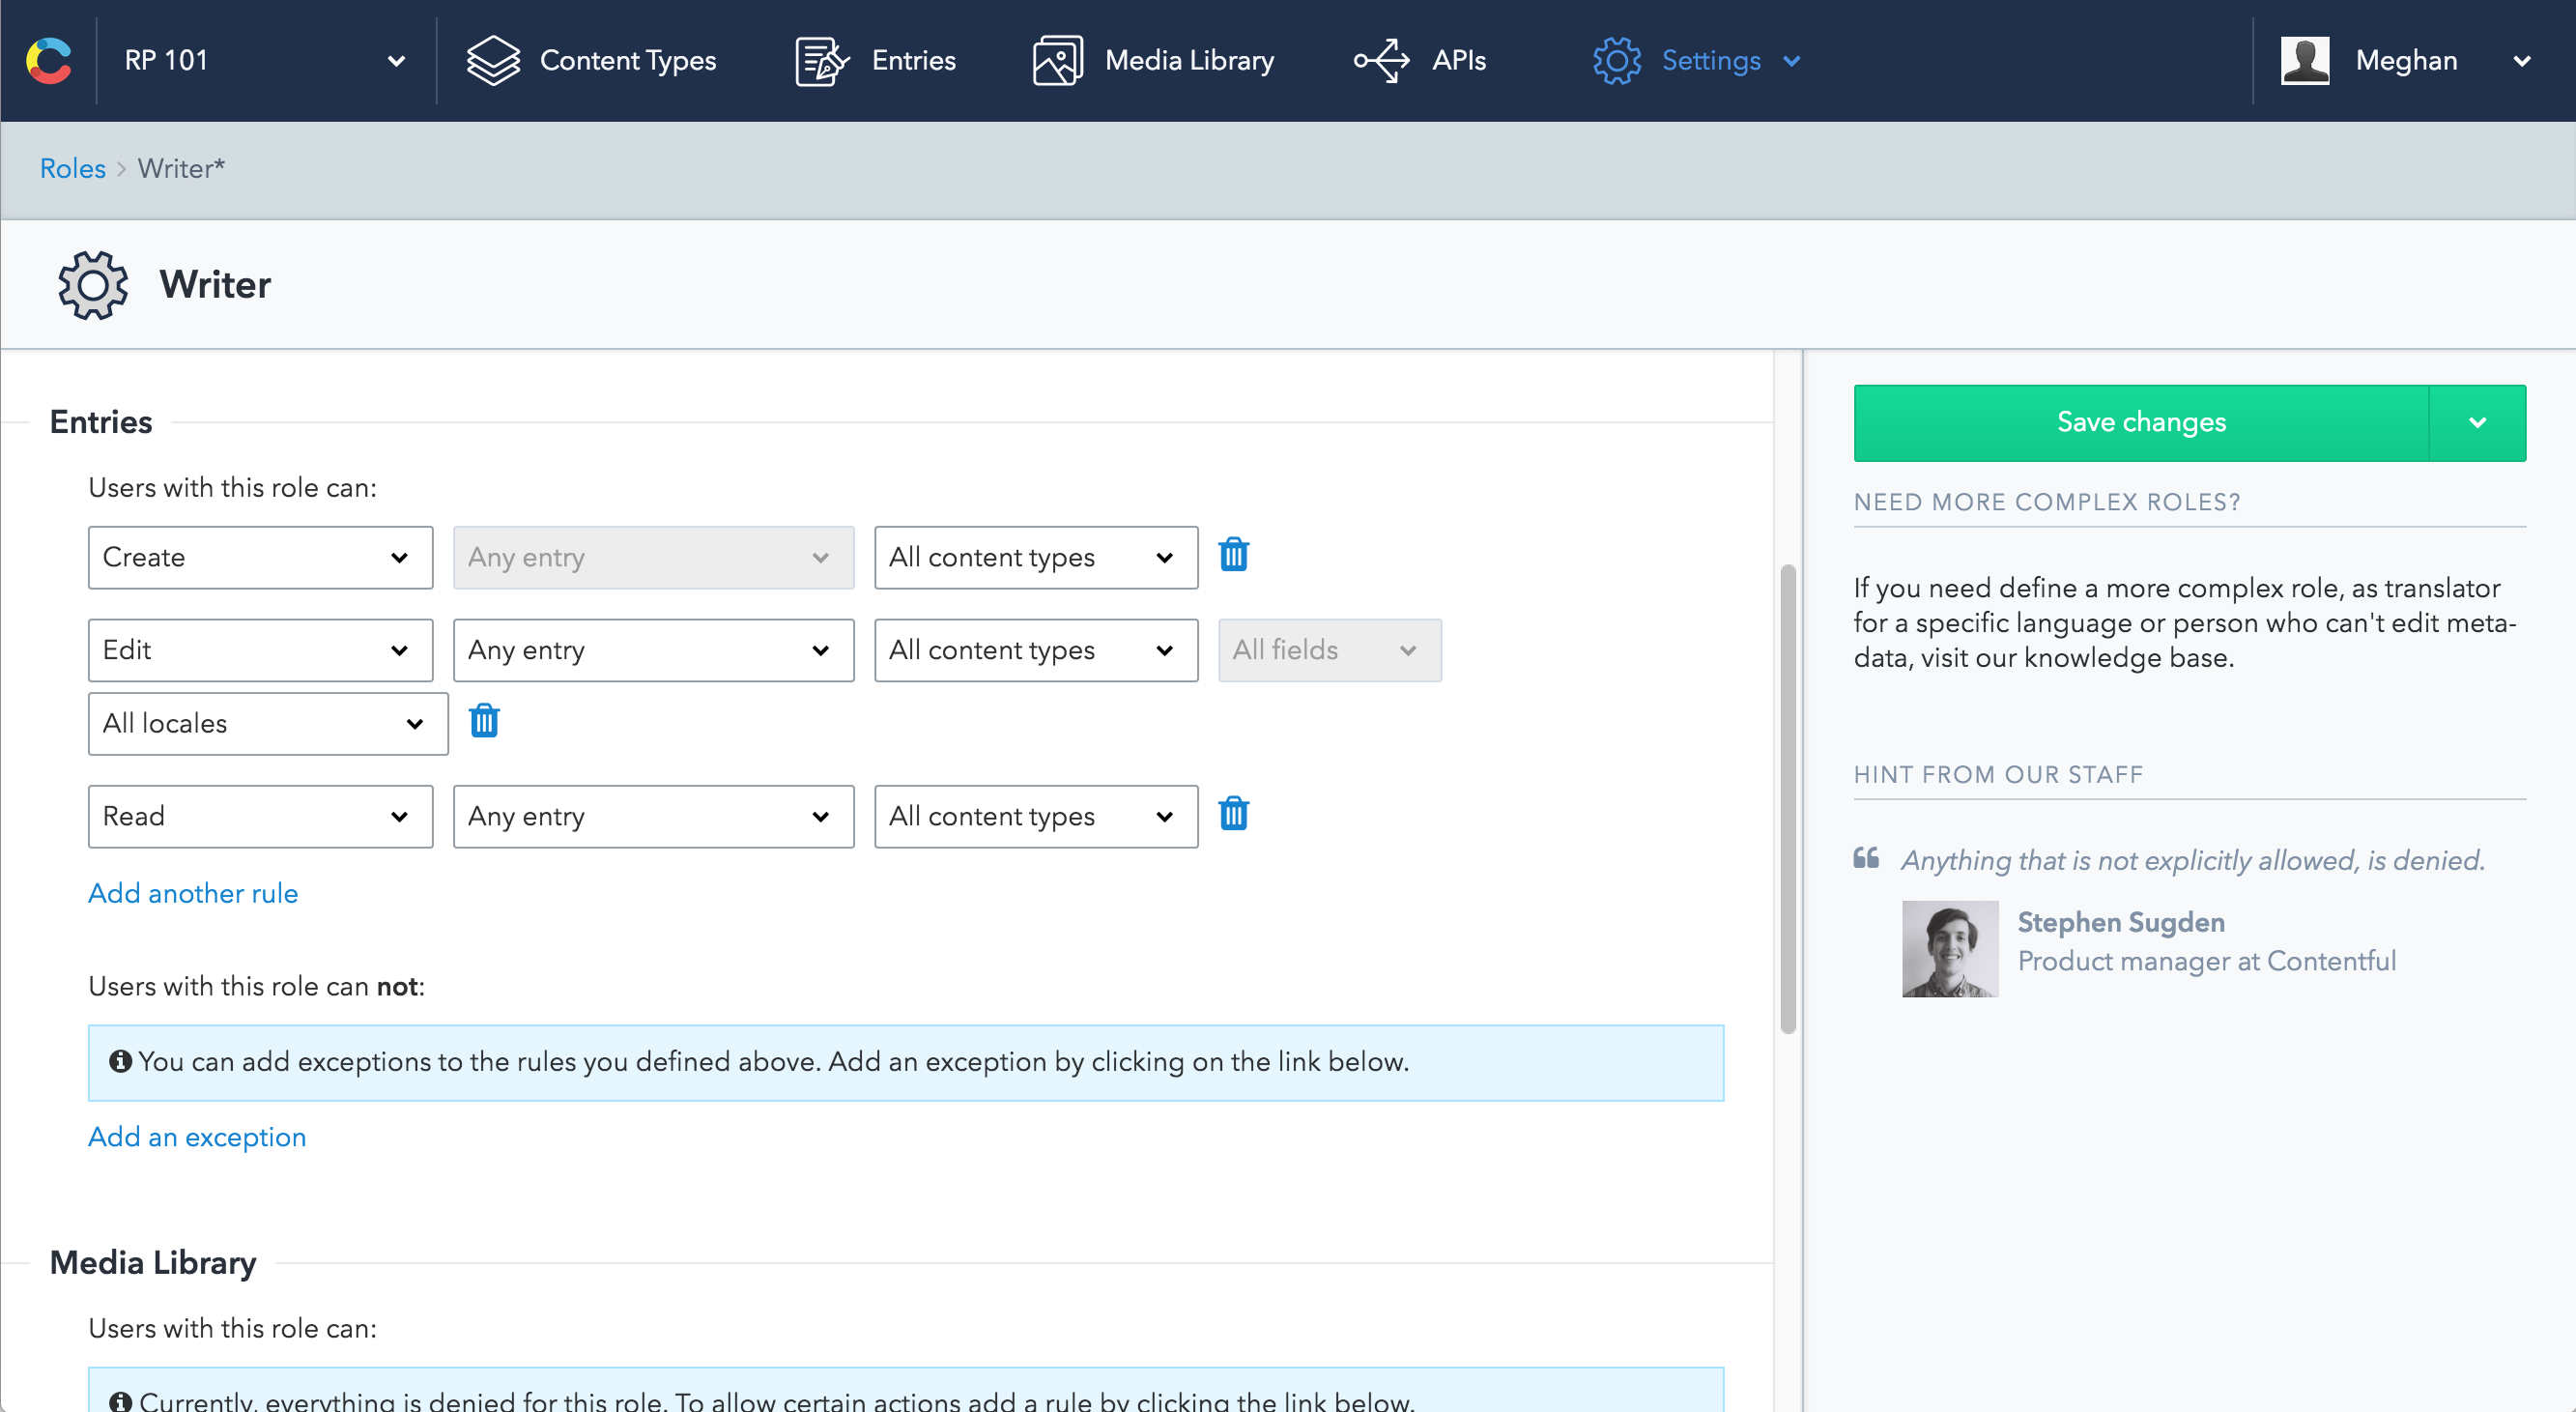
The Writer role is created with the access to create, edit and open entries.
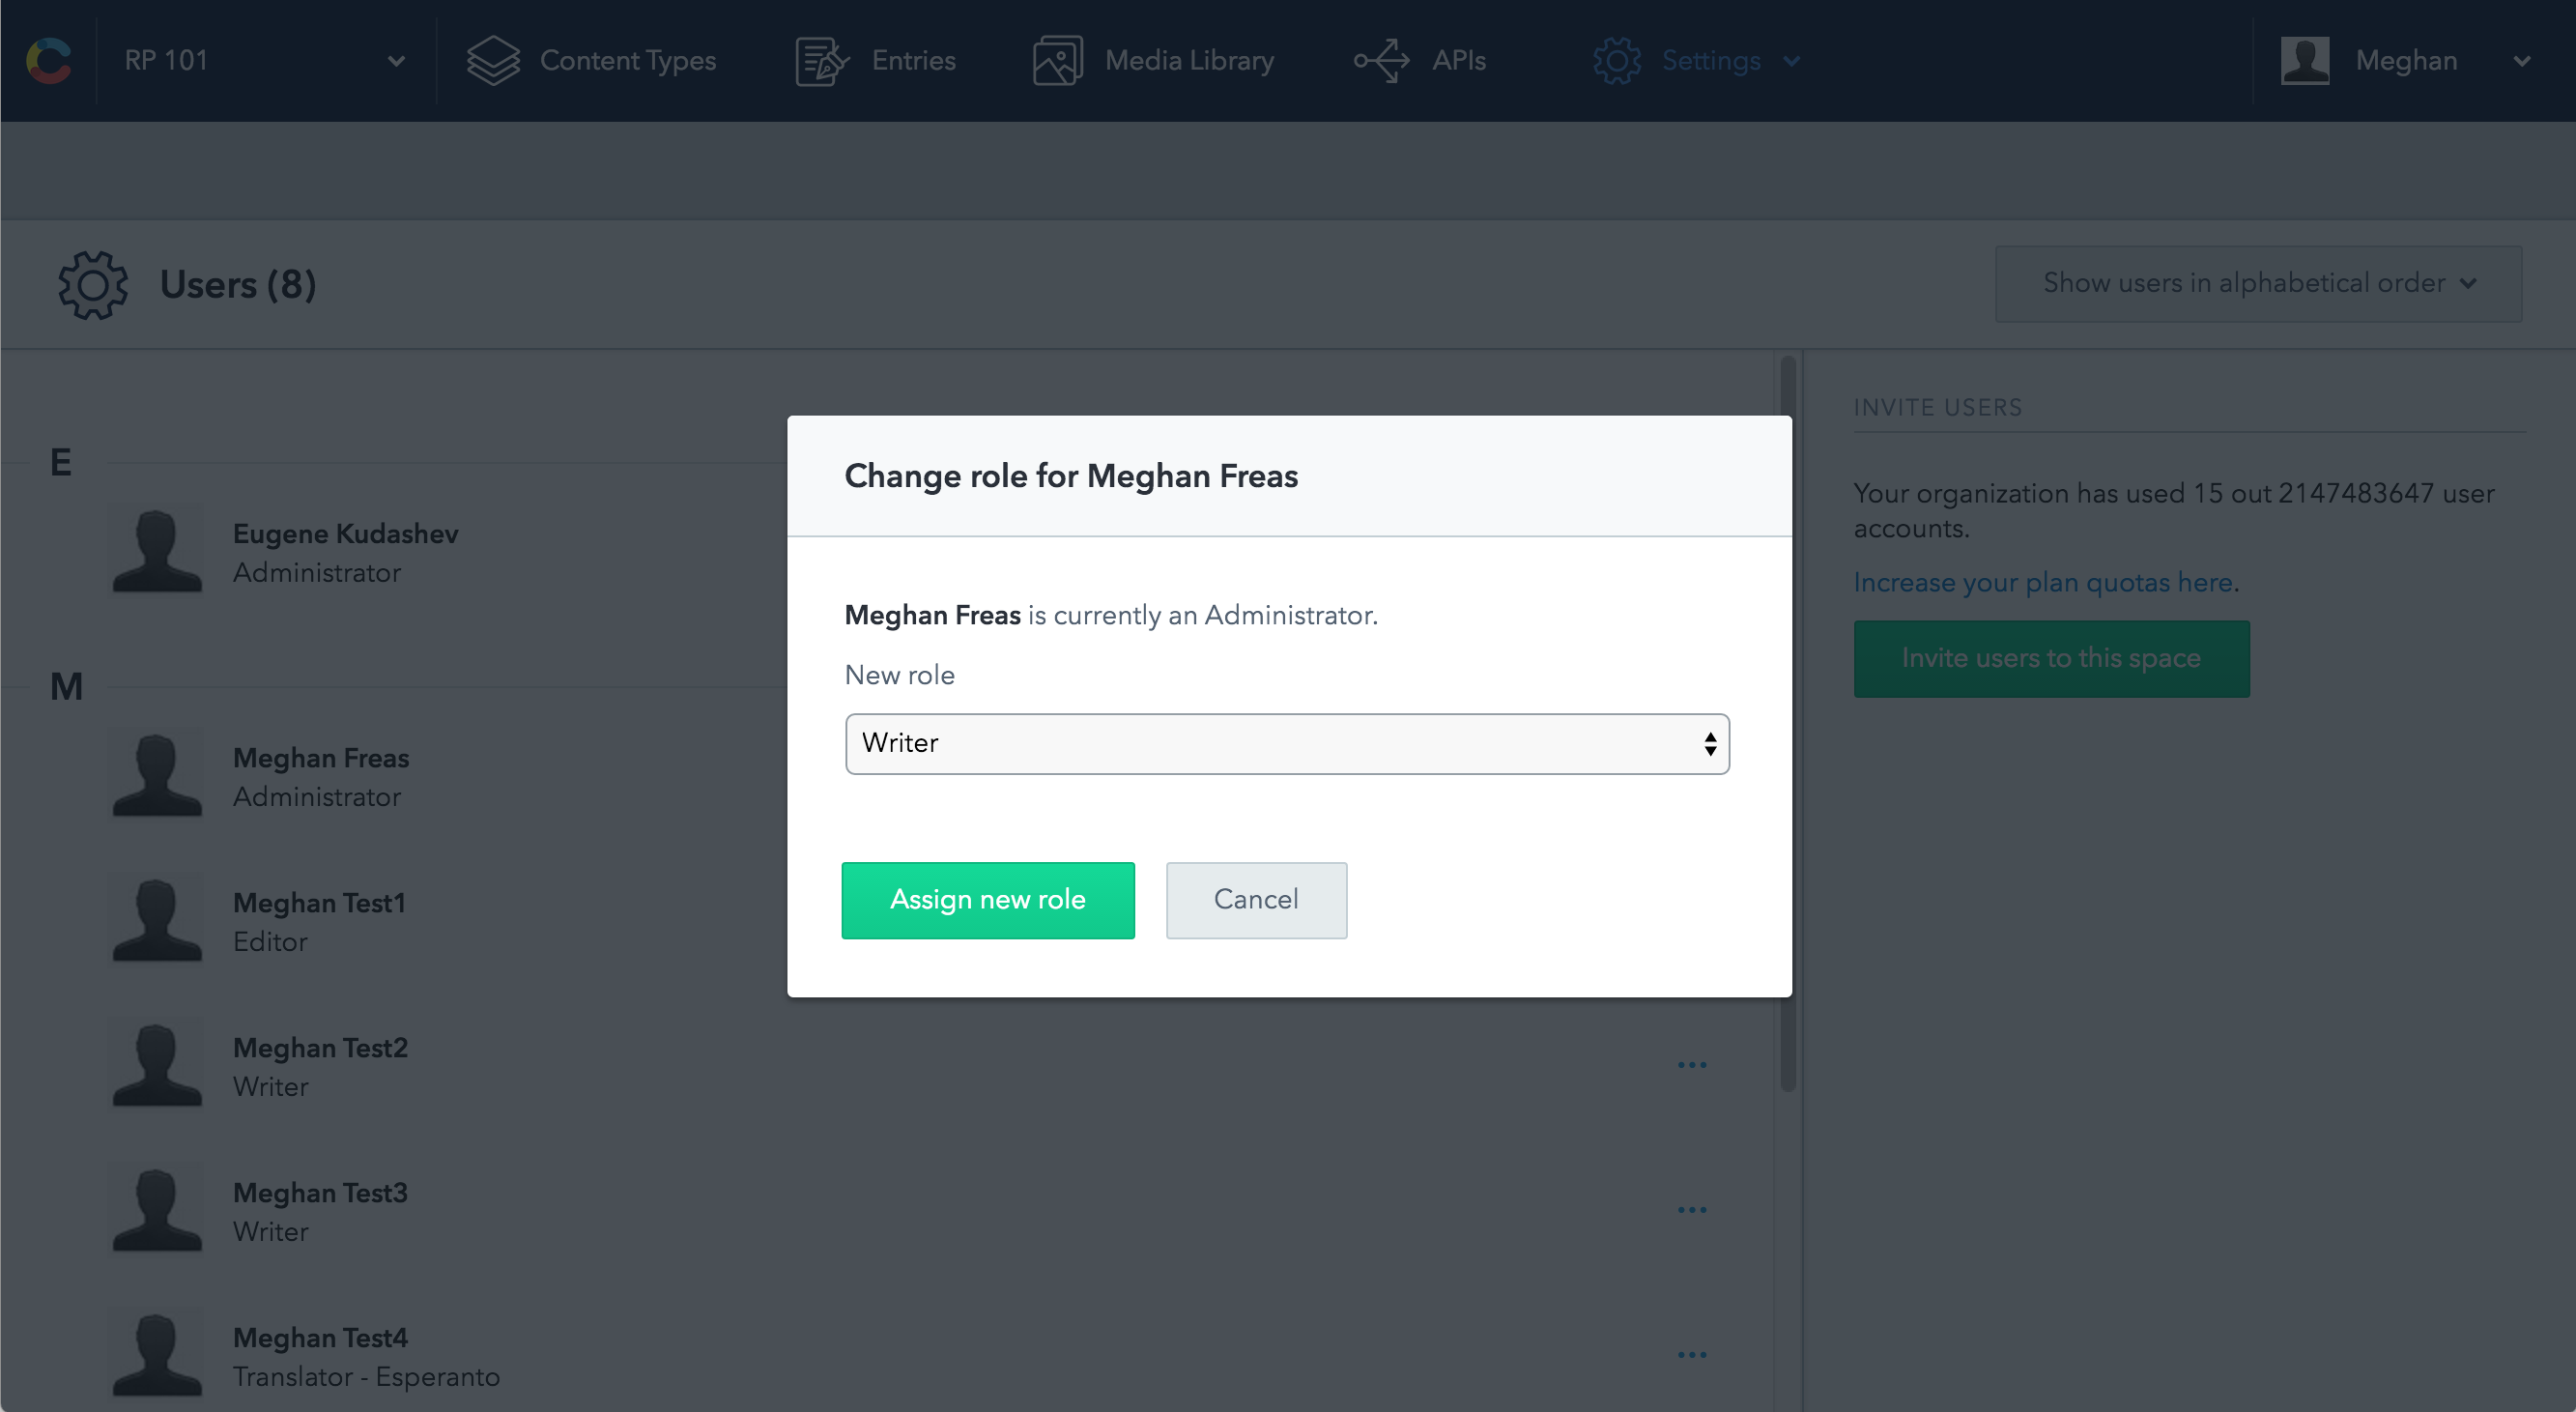
Assigning the role
- Navigate to the list of the roles.
- The label next to the Writer role should read "0 members" – click it.
- You are redirected to the list of the users in this space. If you are the only one, it's just about time to invite some colleagues (or invite yourself with an email like
user+test1@domain.com). - Click "..." on the right, proceed to "Change role", select the role from the list and assign it.
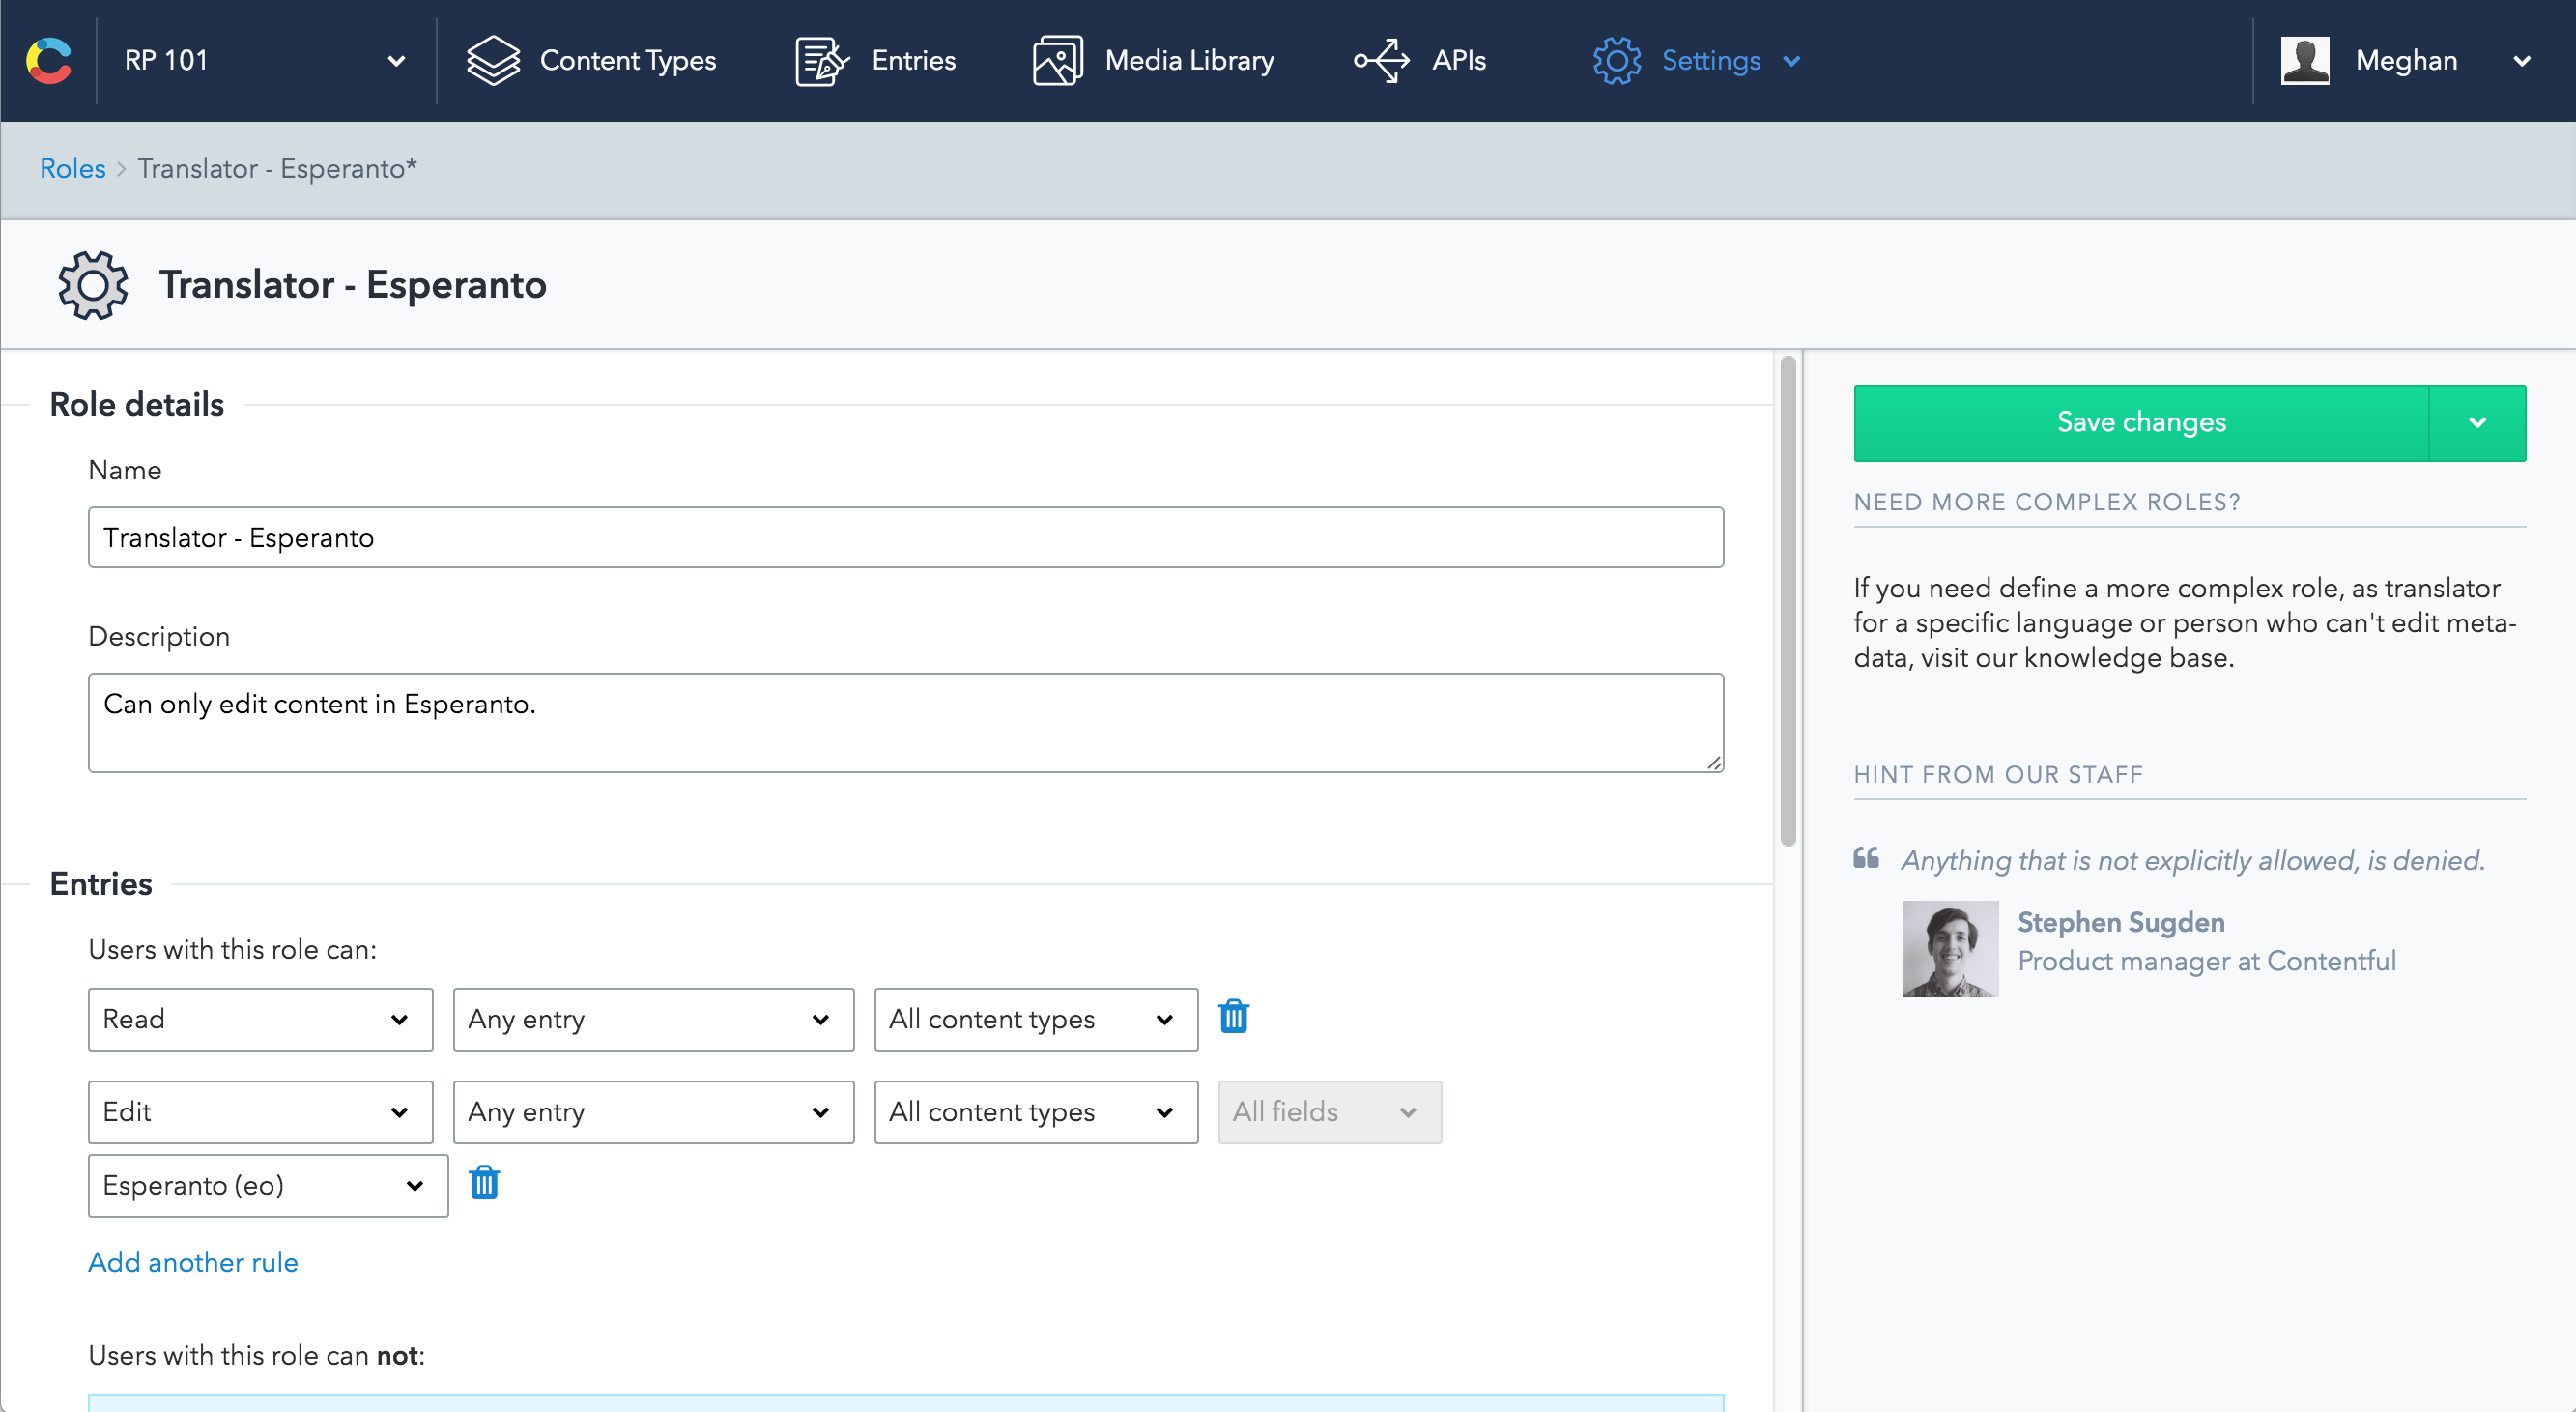
The Translator
- Navigate to the list of the roles and create a new one.
- The translator should be able to view all the entries, but only edit content in the Esperanto language.
- Add two rules: one for Read, another for Edit. Instead of "All locales", the editing rule should be limited to only one language – select in the dropdown and create the Translator. Here's how it should look:
The Editor
There is an editor role which comes by default – you can just open it and make sure that the editor is indeed able to do anything that they want with the entries.
Testing it out
For now the only way to make sure that the rules you set up have the effect you expect is to actually log in under each user and see how the interface looks.
Here is how the list of entries and one opened entry looks for different users.
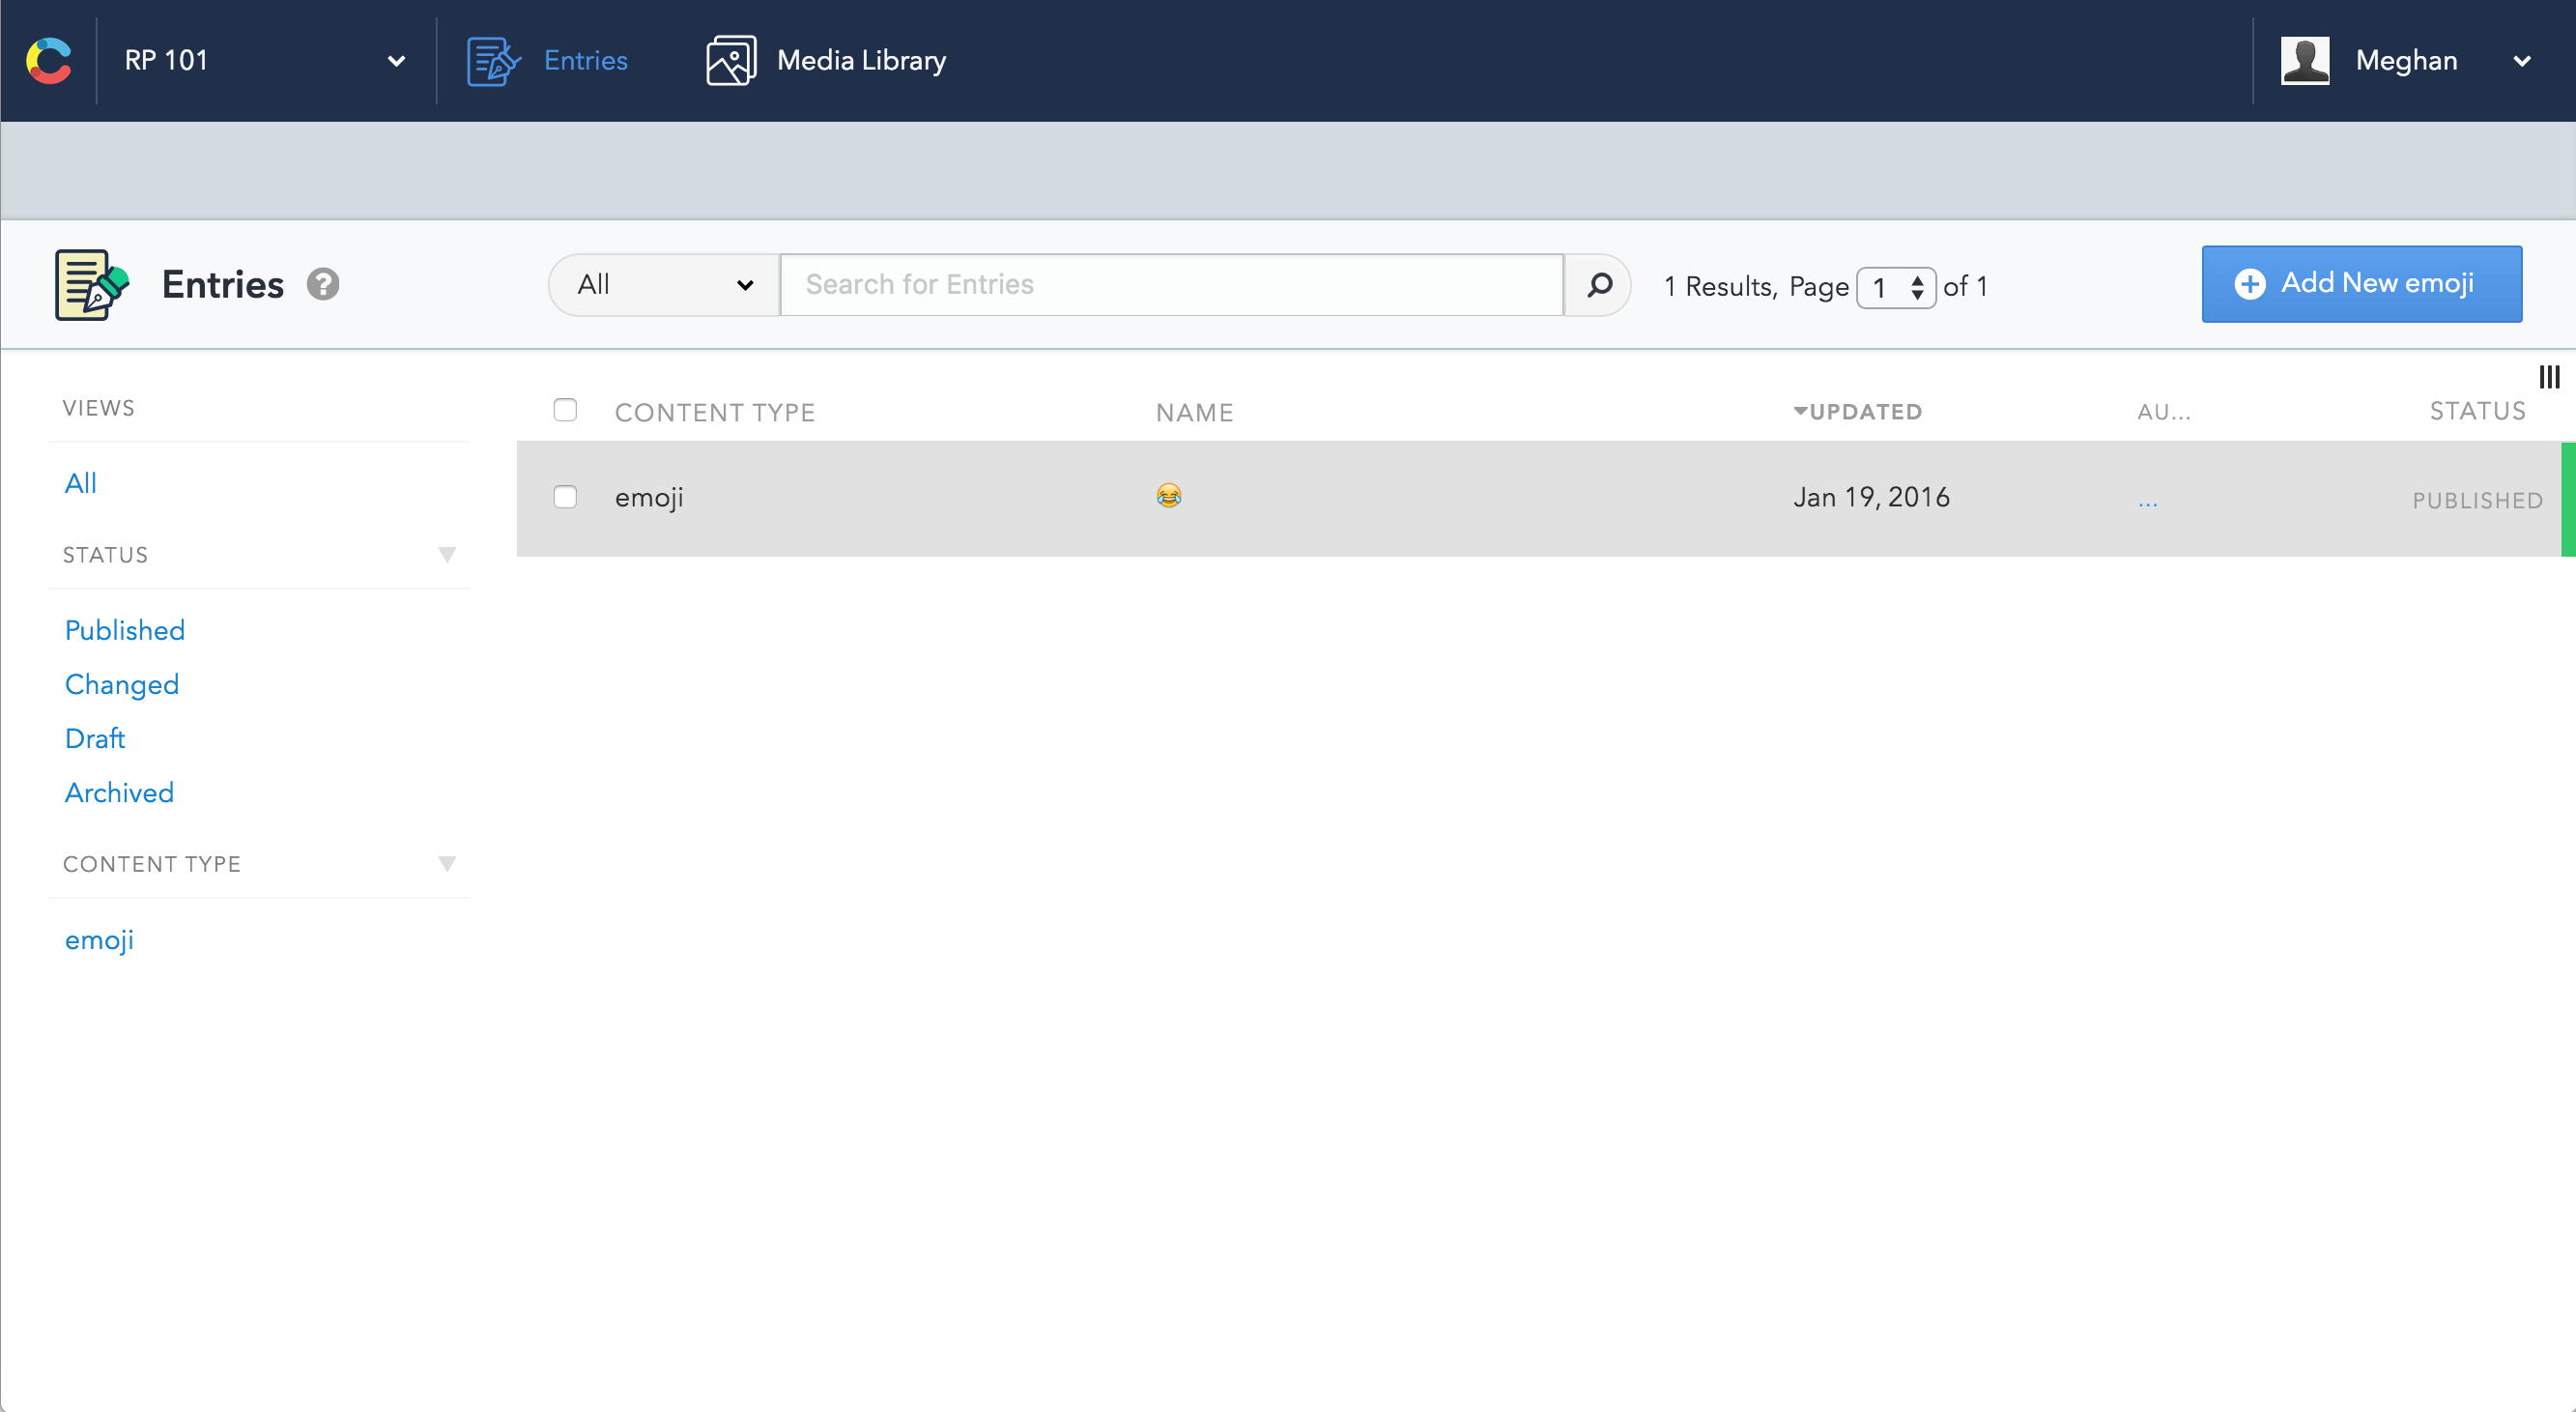
List of entries, editor's view: they can create entries.
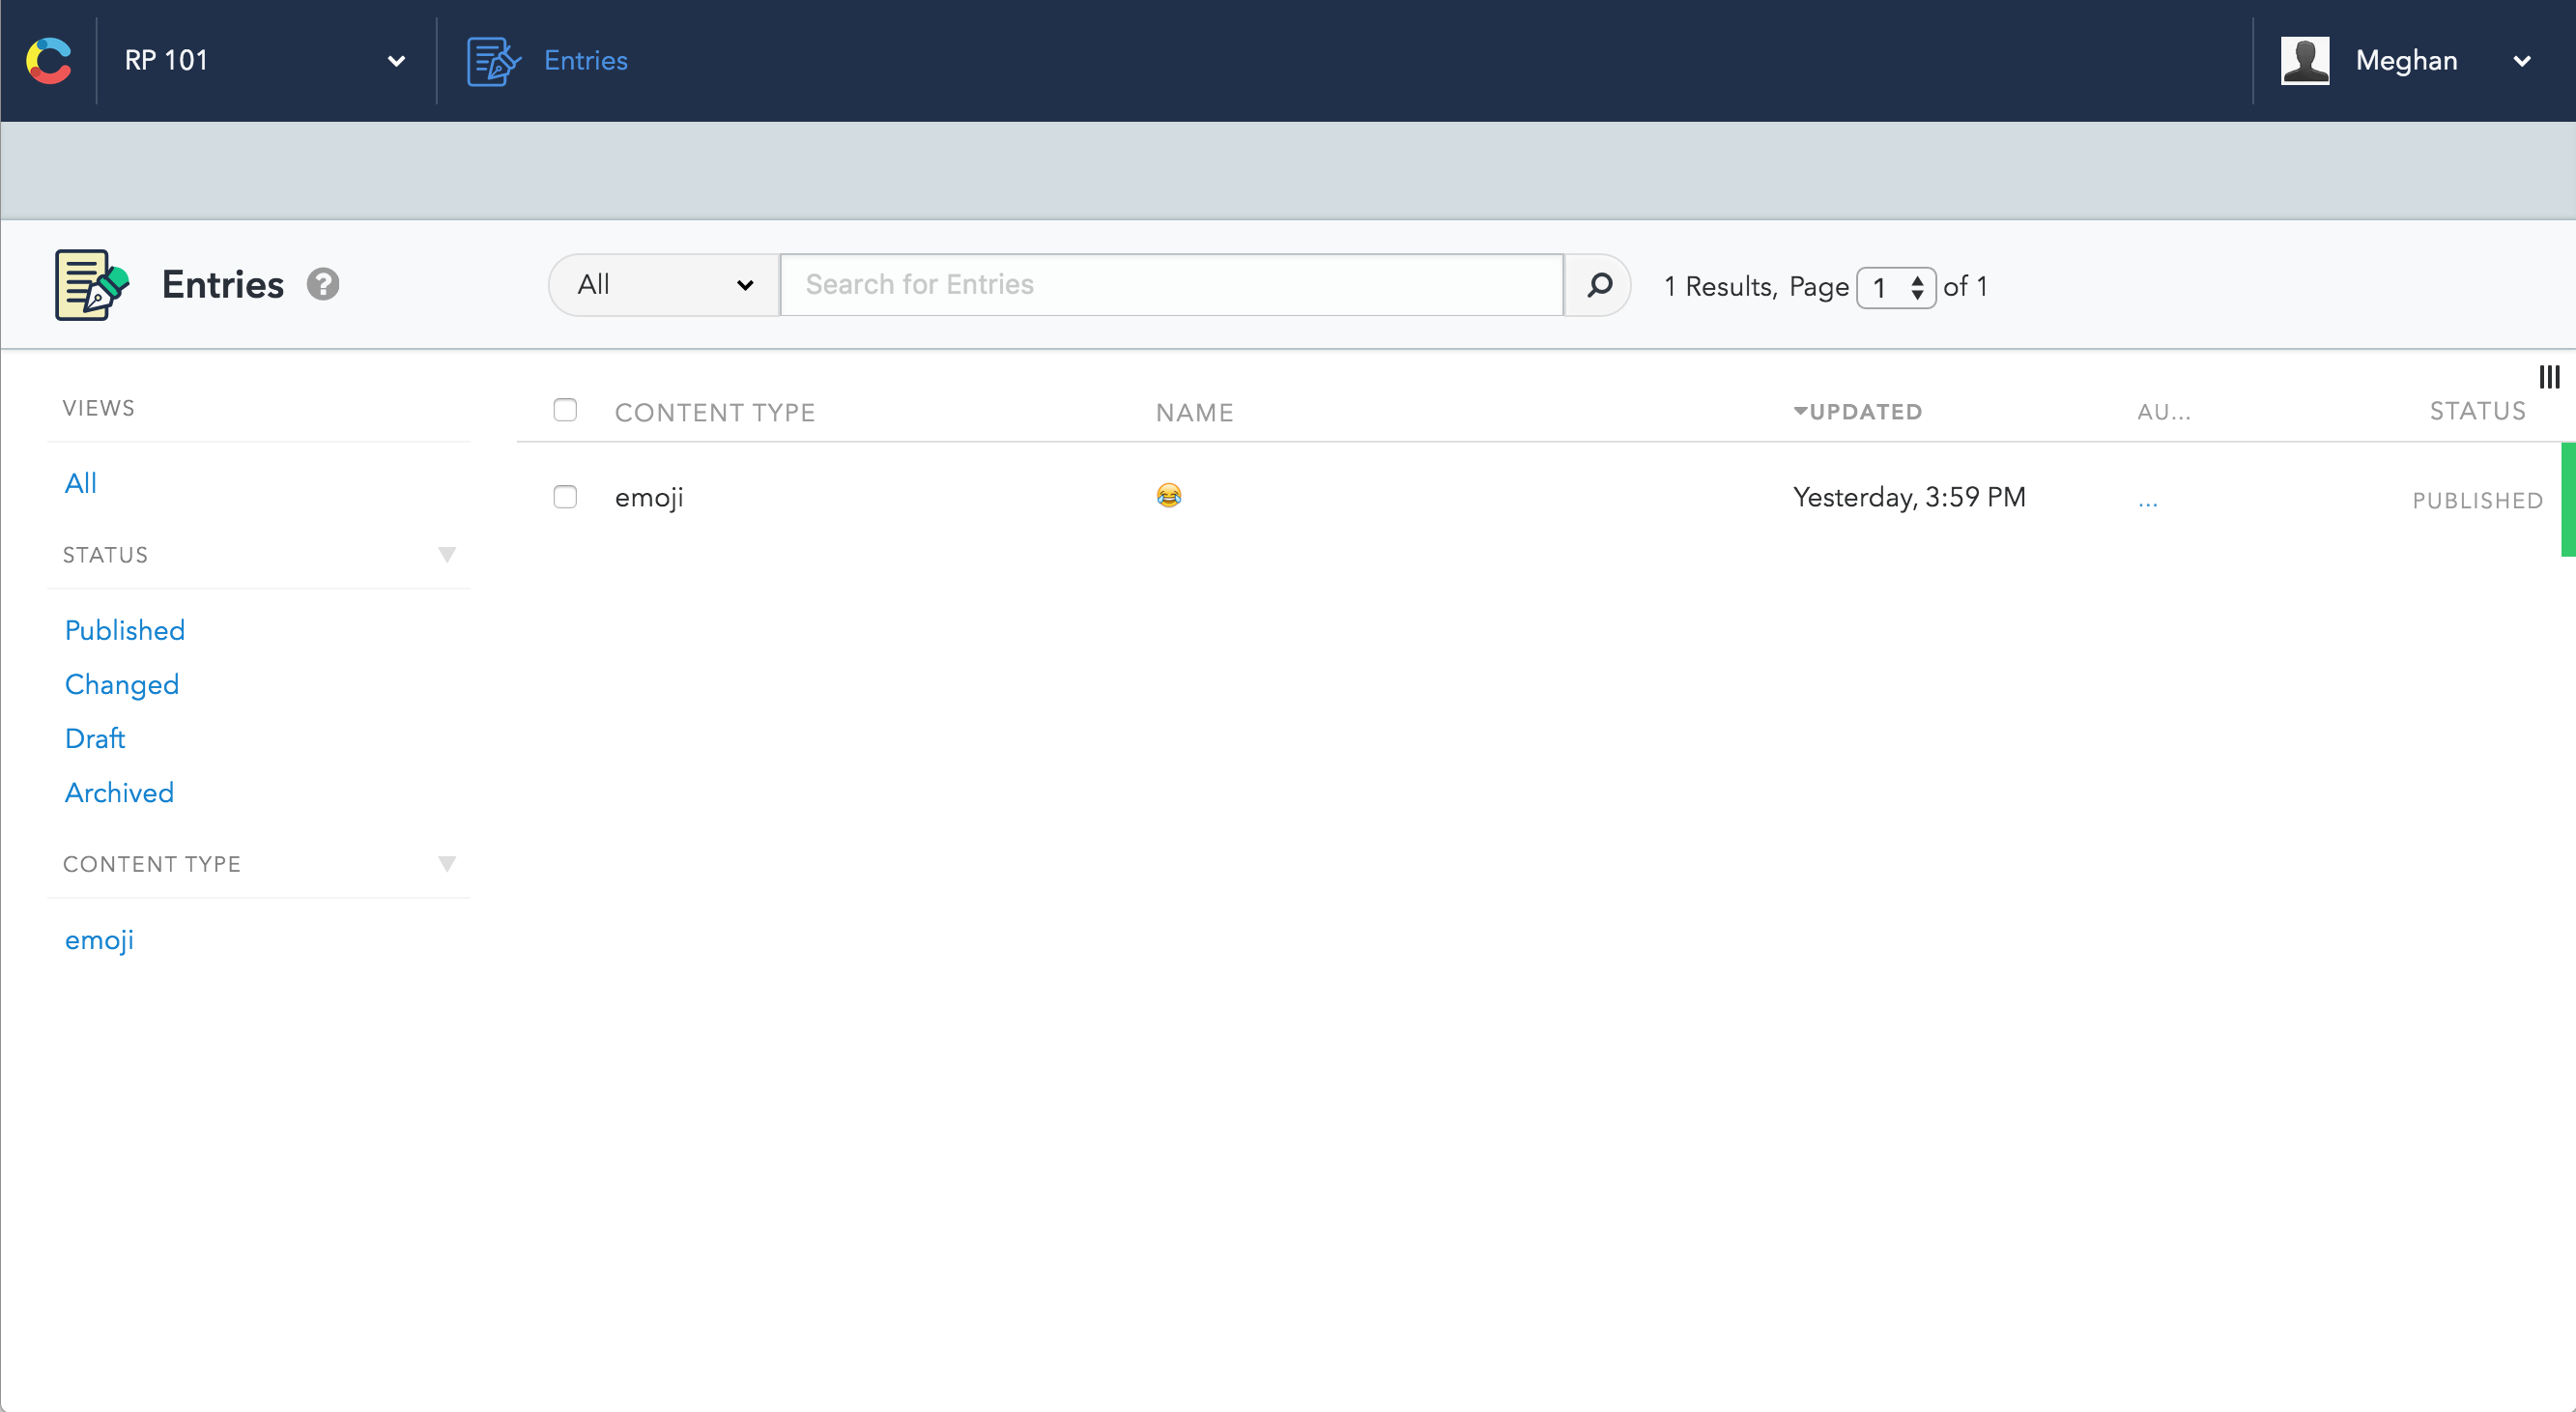
List of entries, translator's view: they can't create entries, but can open the existing ones.
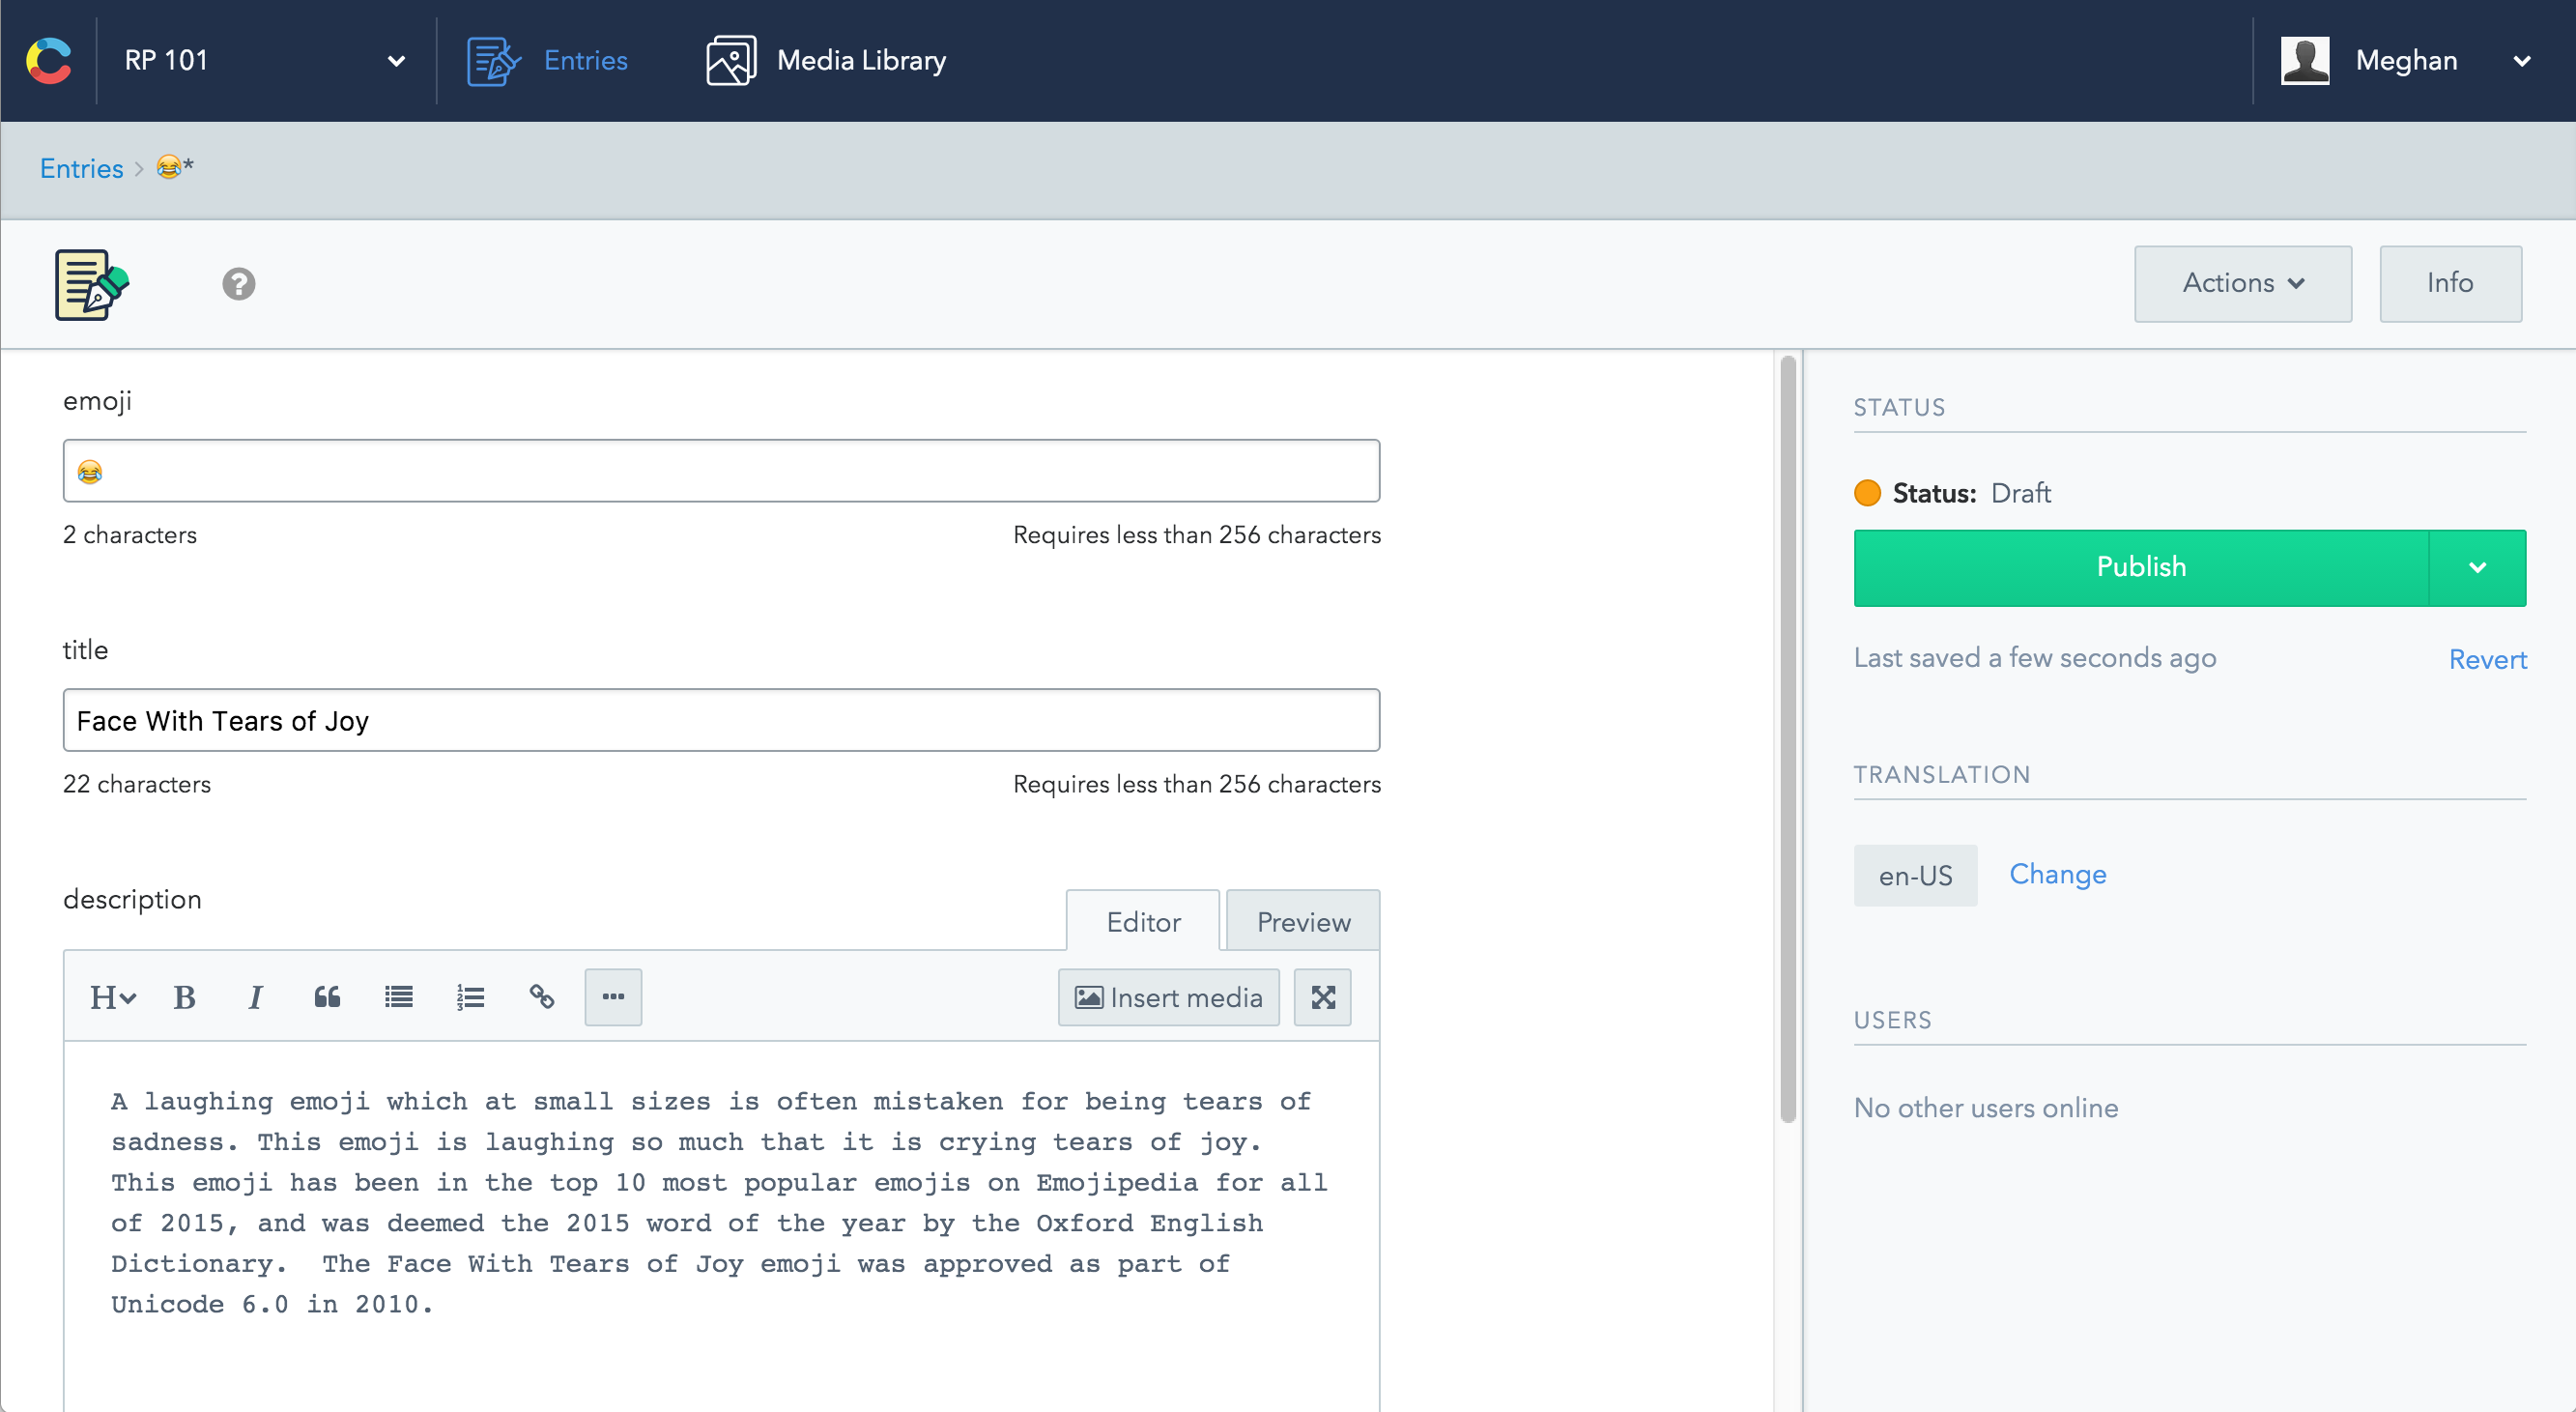
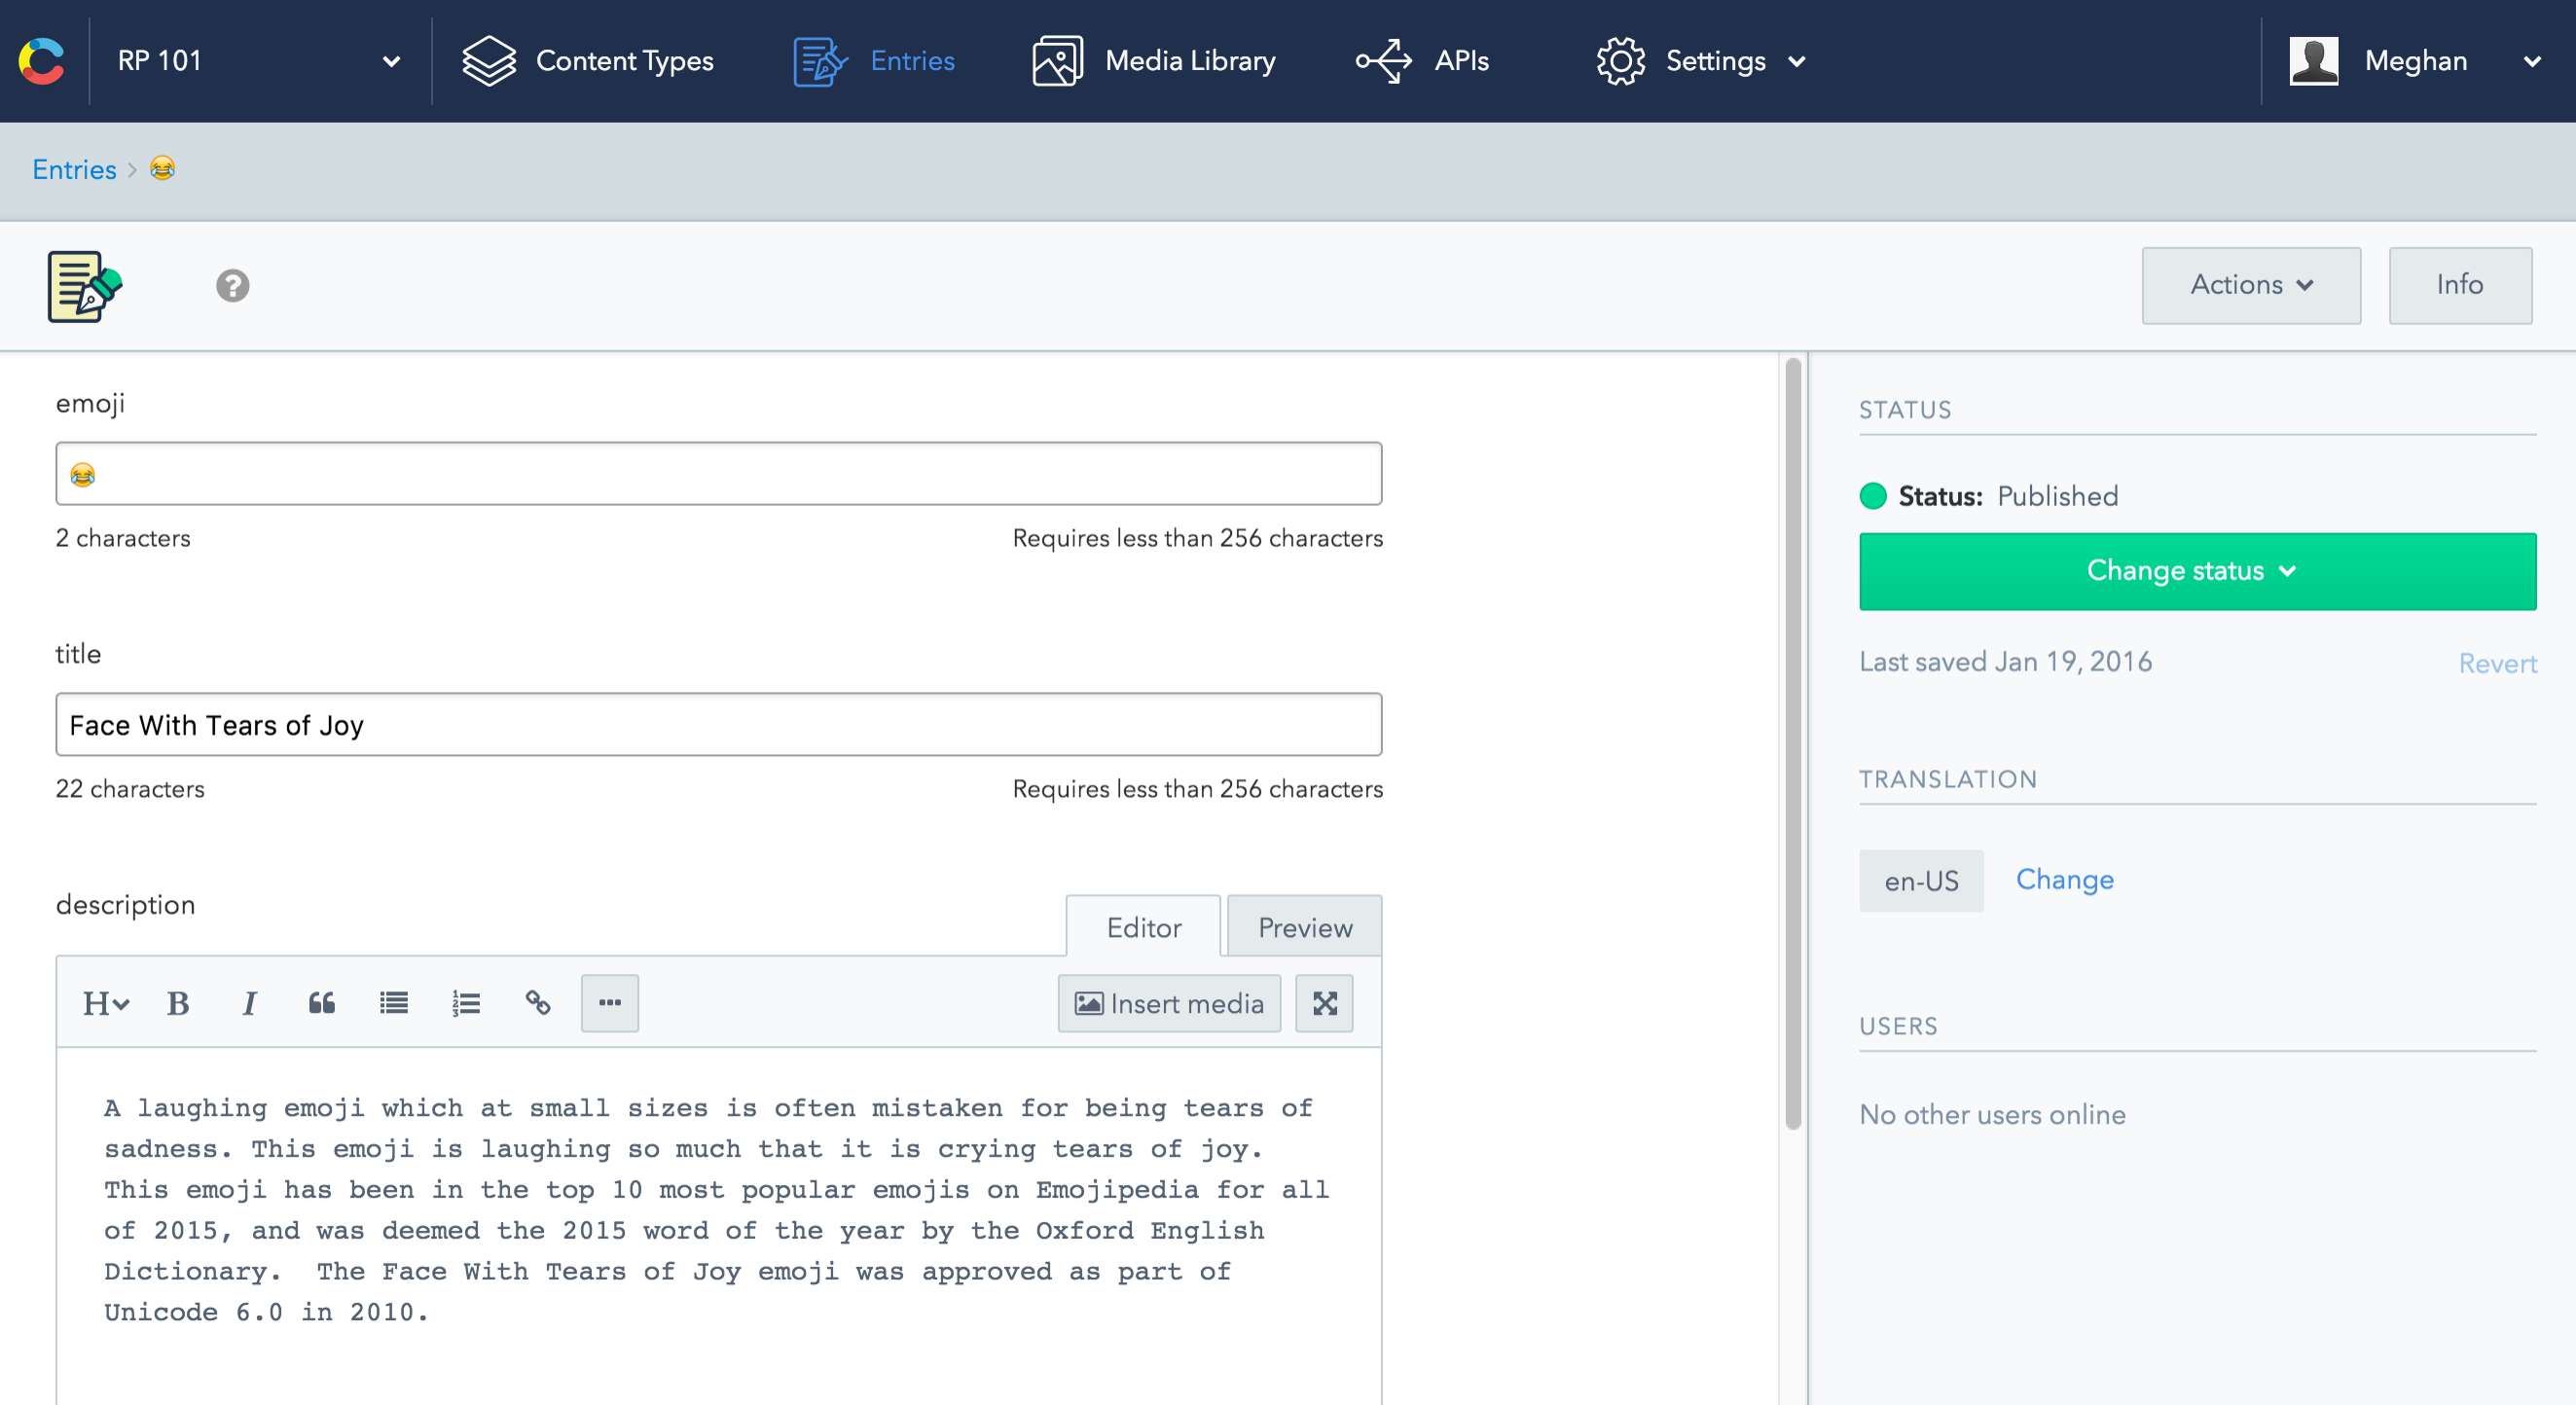
Opened entry, editor's view: the "Publish" button is enabled.
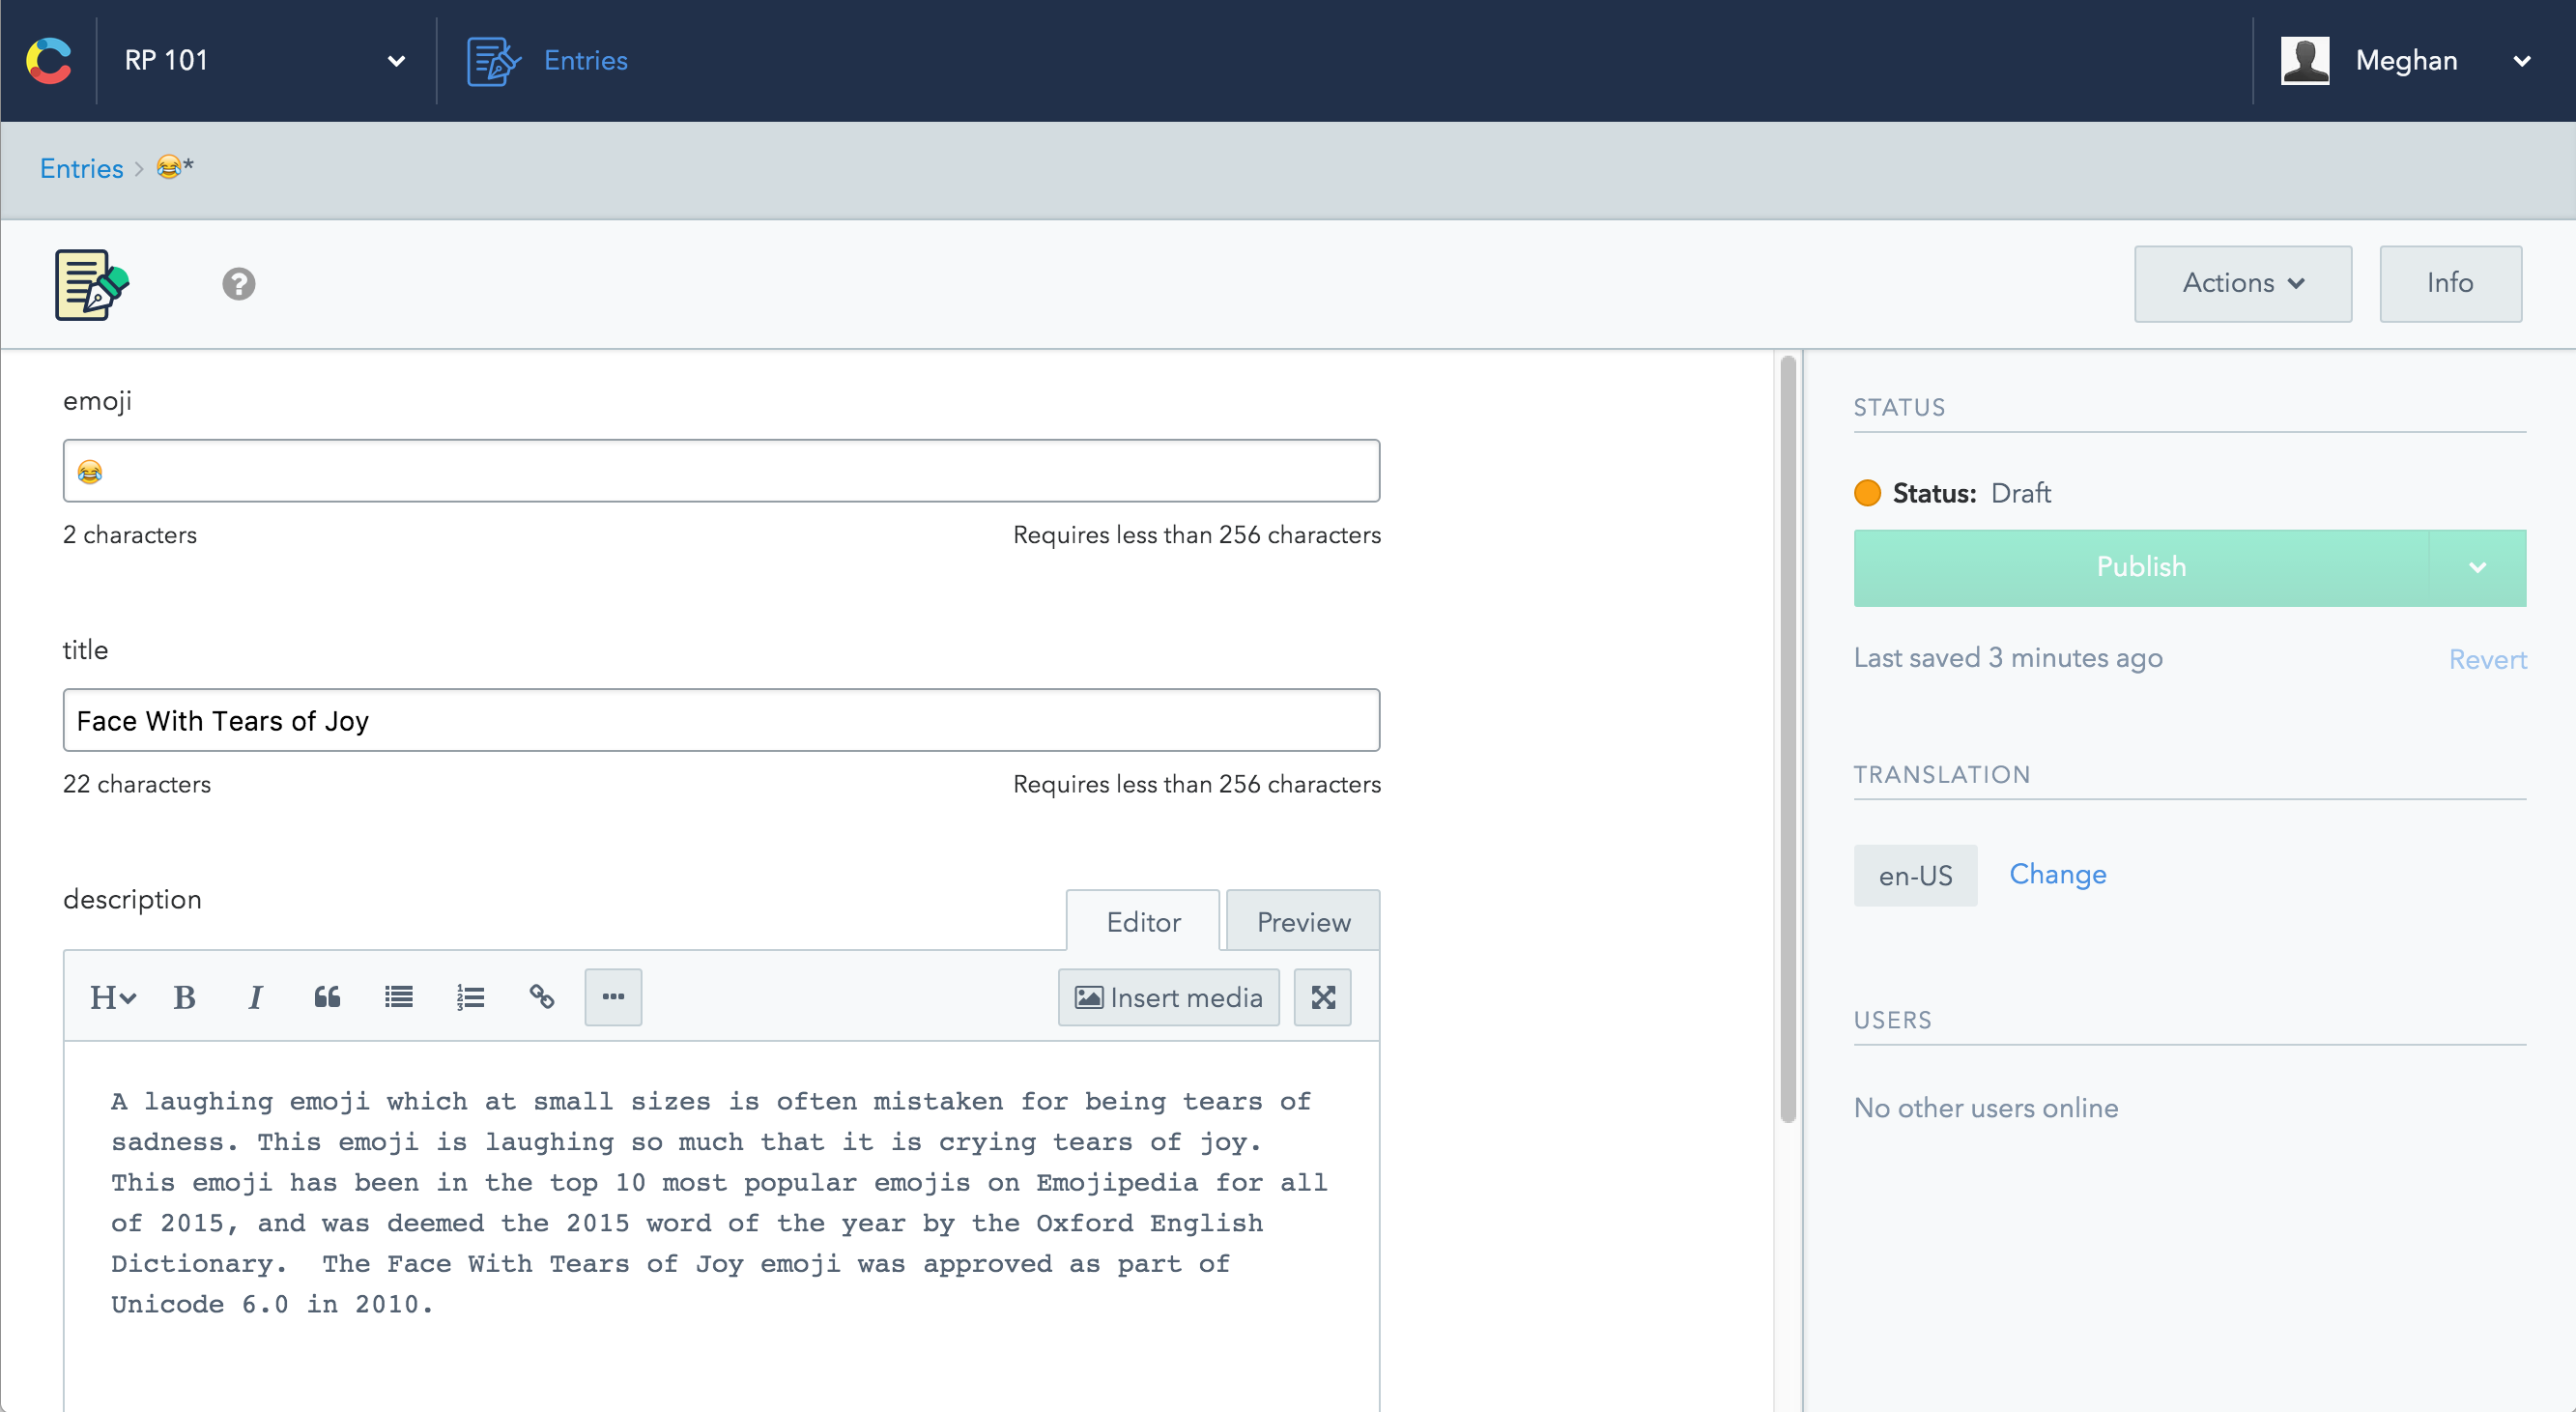
Opened entry, writer's view: the "Publish" button is disabled, as desired.
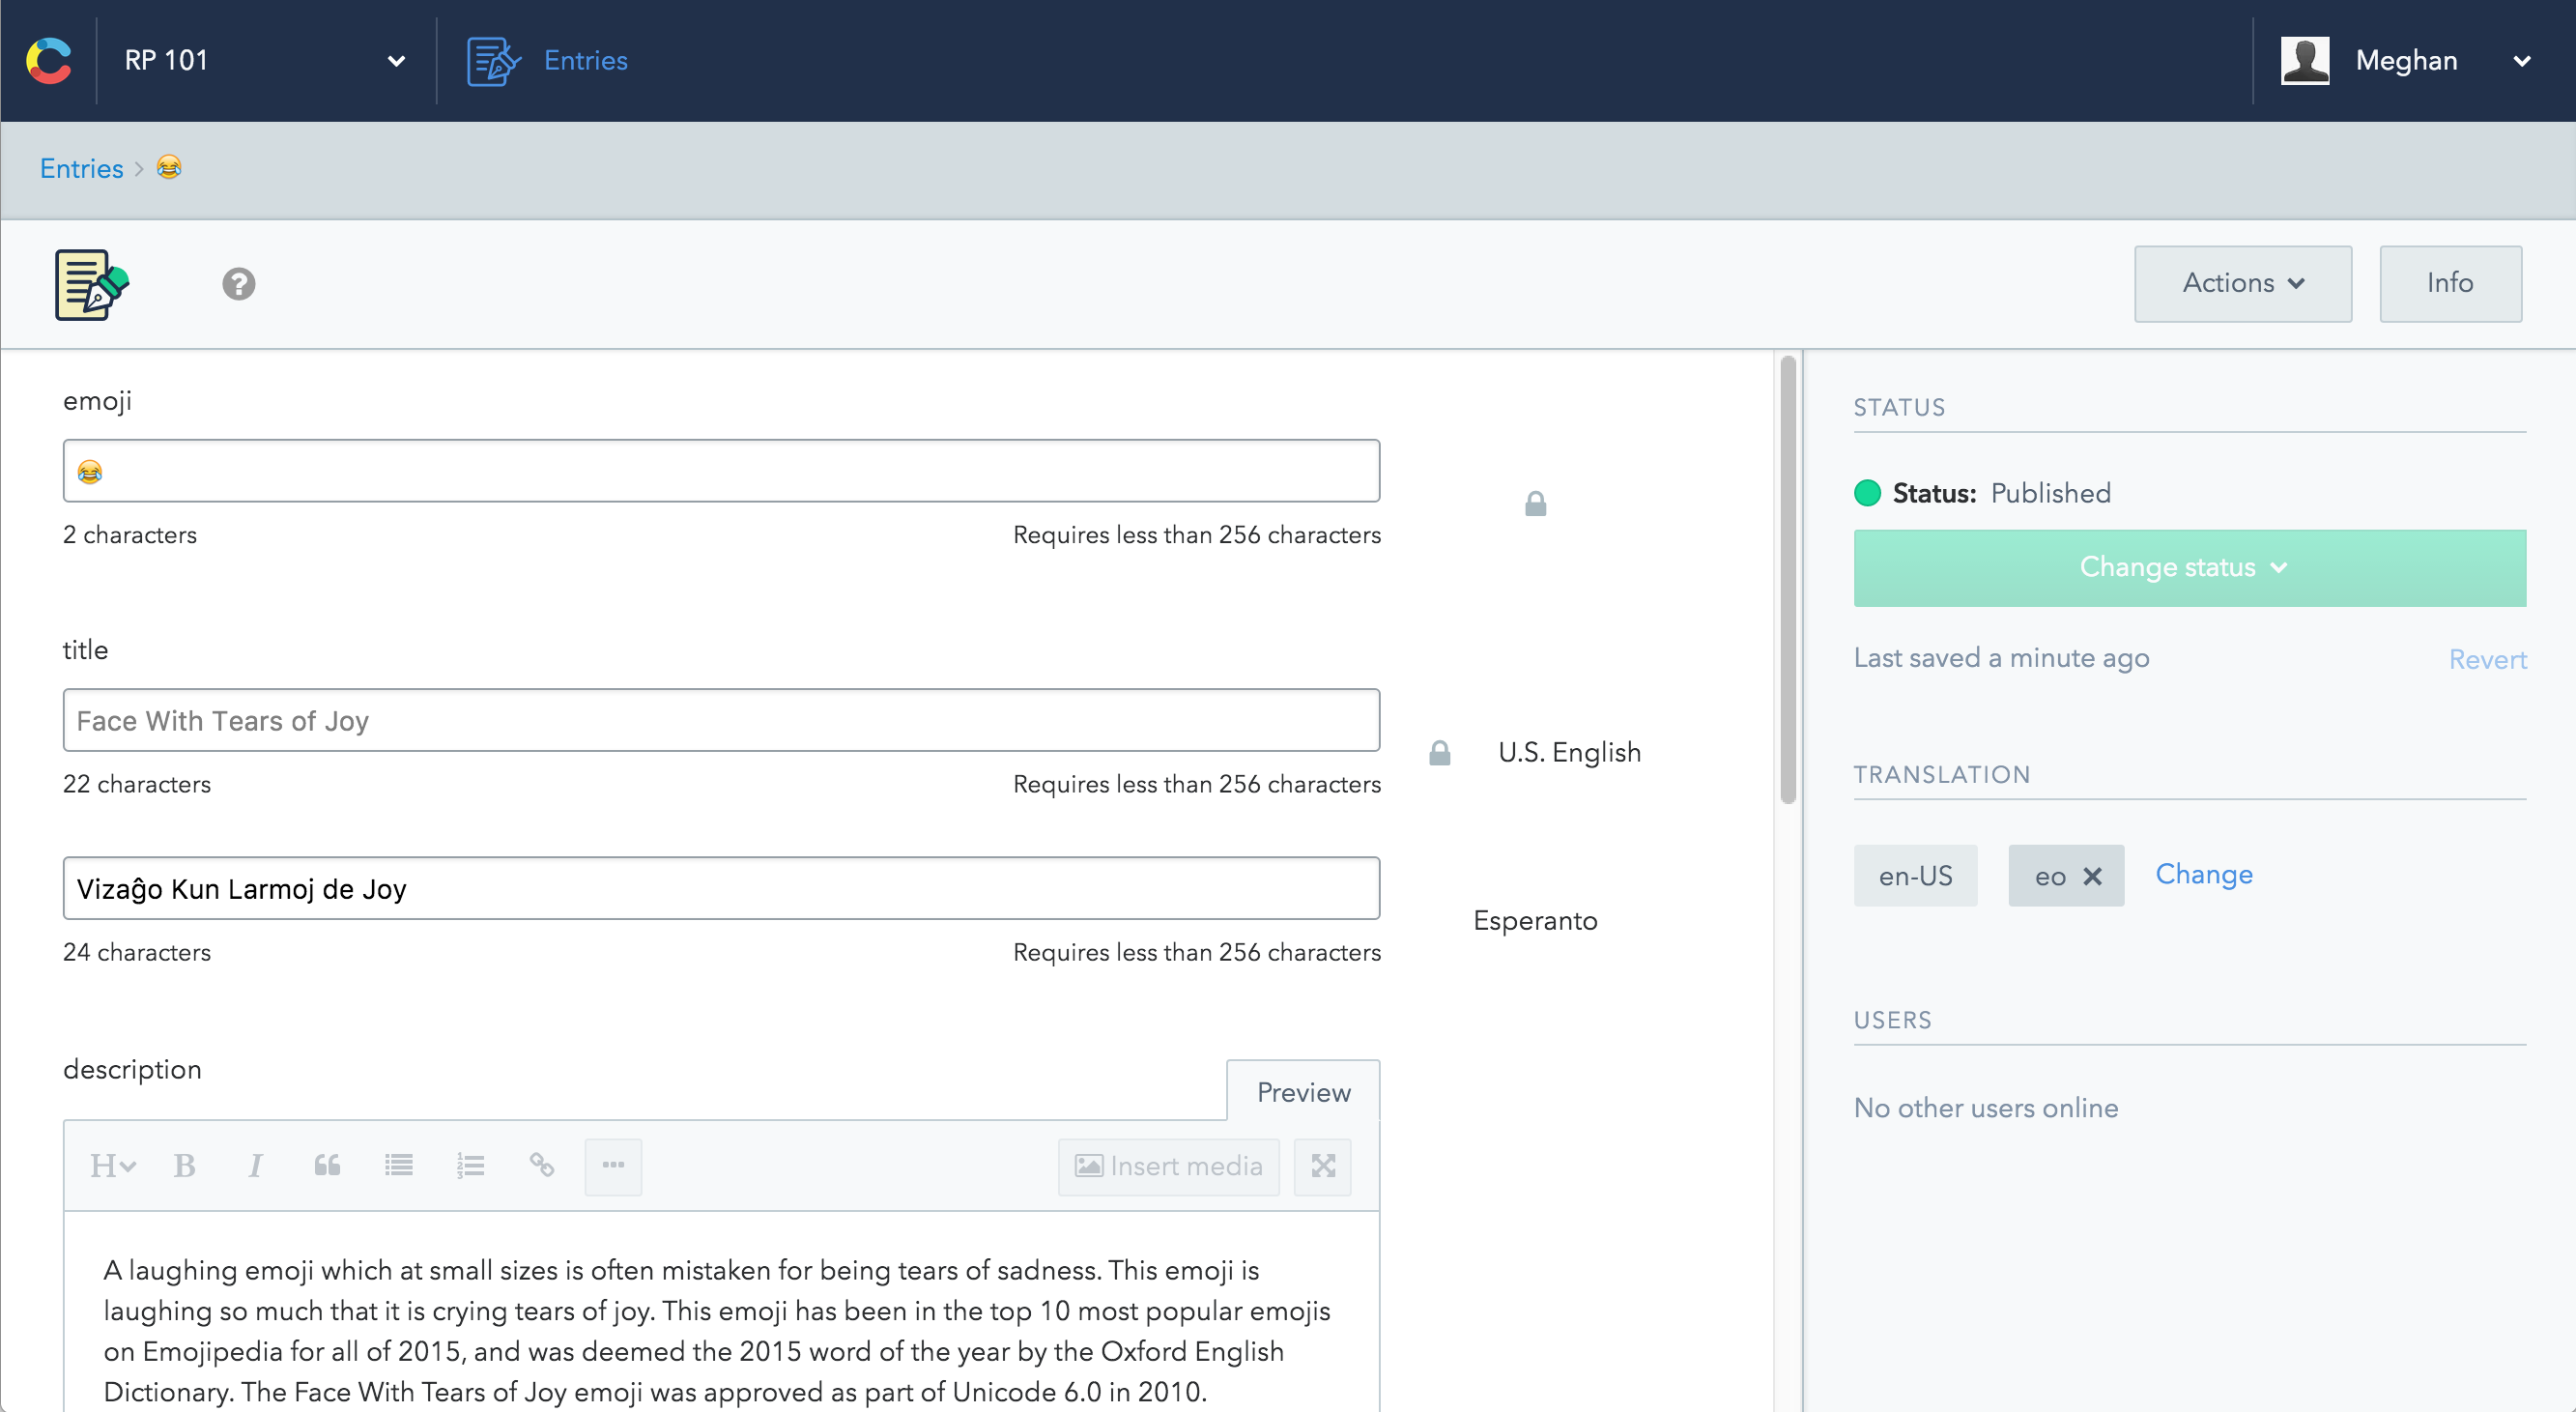
Opened entry, translator's view: the Esperanto fields are editable, whereas the English ones are not.