Getting started with entry extensions
Introduction
This guide covers the basics of entry extensions, a type of UI extension that replaces all fields of an entry with a single extension. It includes common use cases and how to implement them, an example for creating conditional fields with entry extensions, and resources for building your own extension.
Use cases
Entry extensions are used for two main purposes:
- Adapting the logic of fields in order to customize the entry interface, for example:
- Grouping fields into tabs
- Conditionally displaying or hiding fields
- “Flattening” a complex content model into, e.g., a page-view based editing UI
- Creating an entirely new content editing UI by replacing the whole entry interface with a custom input experience, for example with a third-party app

Preparation
To better understand entry extensions, it’s helpful to first read about the locations and types of different UI extensions. Also, please clone the sample entry extension that’s covered as the example for this guide.
Specifics of entry extensions
Entry extensions replace the entire editor interface with a single extension. As with other UI extensions, they are small HTML5 applications that interact with the Contentful web app through the UI extensions SDK. This UI extension is responsible for managing all fields of an entry.
Building an entry extension
This UI extensions framework allows you to build entry extensions in any way you choose. The simplest method is to use the create-contentful-extension CLI. It produces a basic but fully-functional React-based entry extension if you follow these steps:
- Run
npx @contentful/create-contentful-extension my-entry-extension - Select entry extension as the type
- You can choose between JavaScript and TypeScript
To match the native look and feel of the Contentful web app, you can draw from the Forma36 React components library. Forma36 is a design system developed by Contentful that you can use to reduce overhead when creating UI extensions.
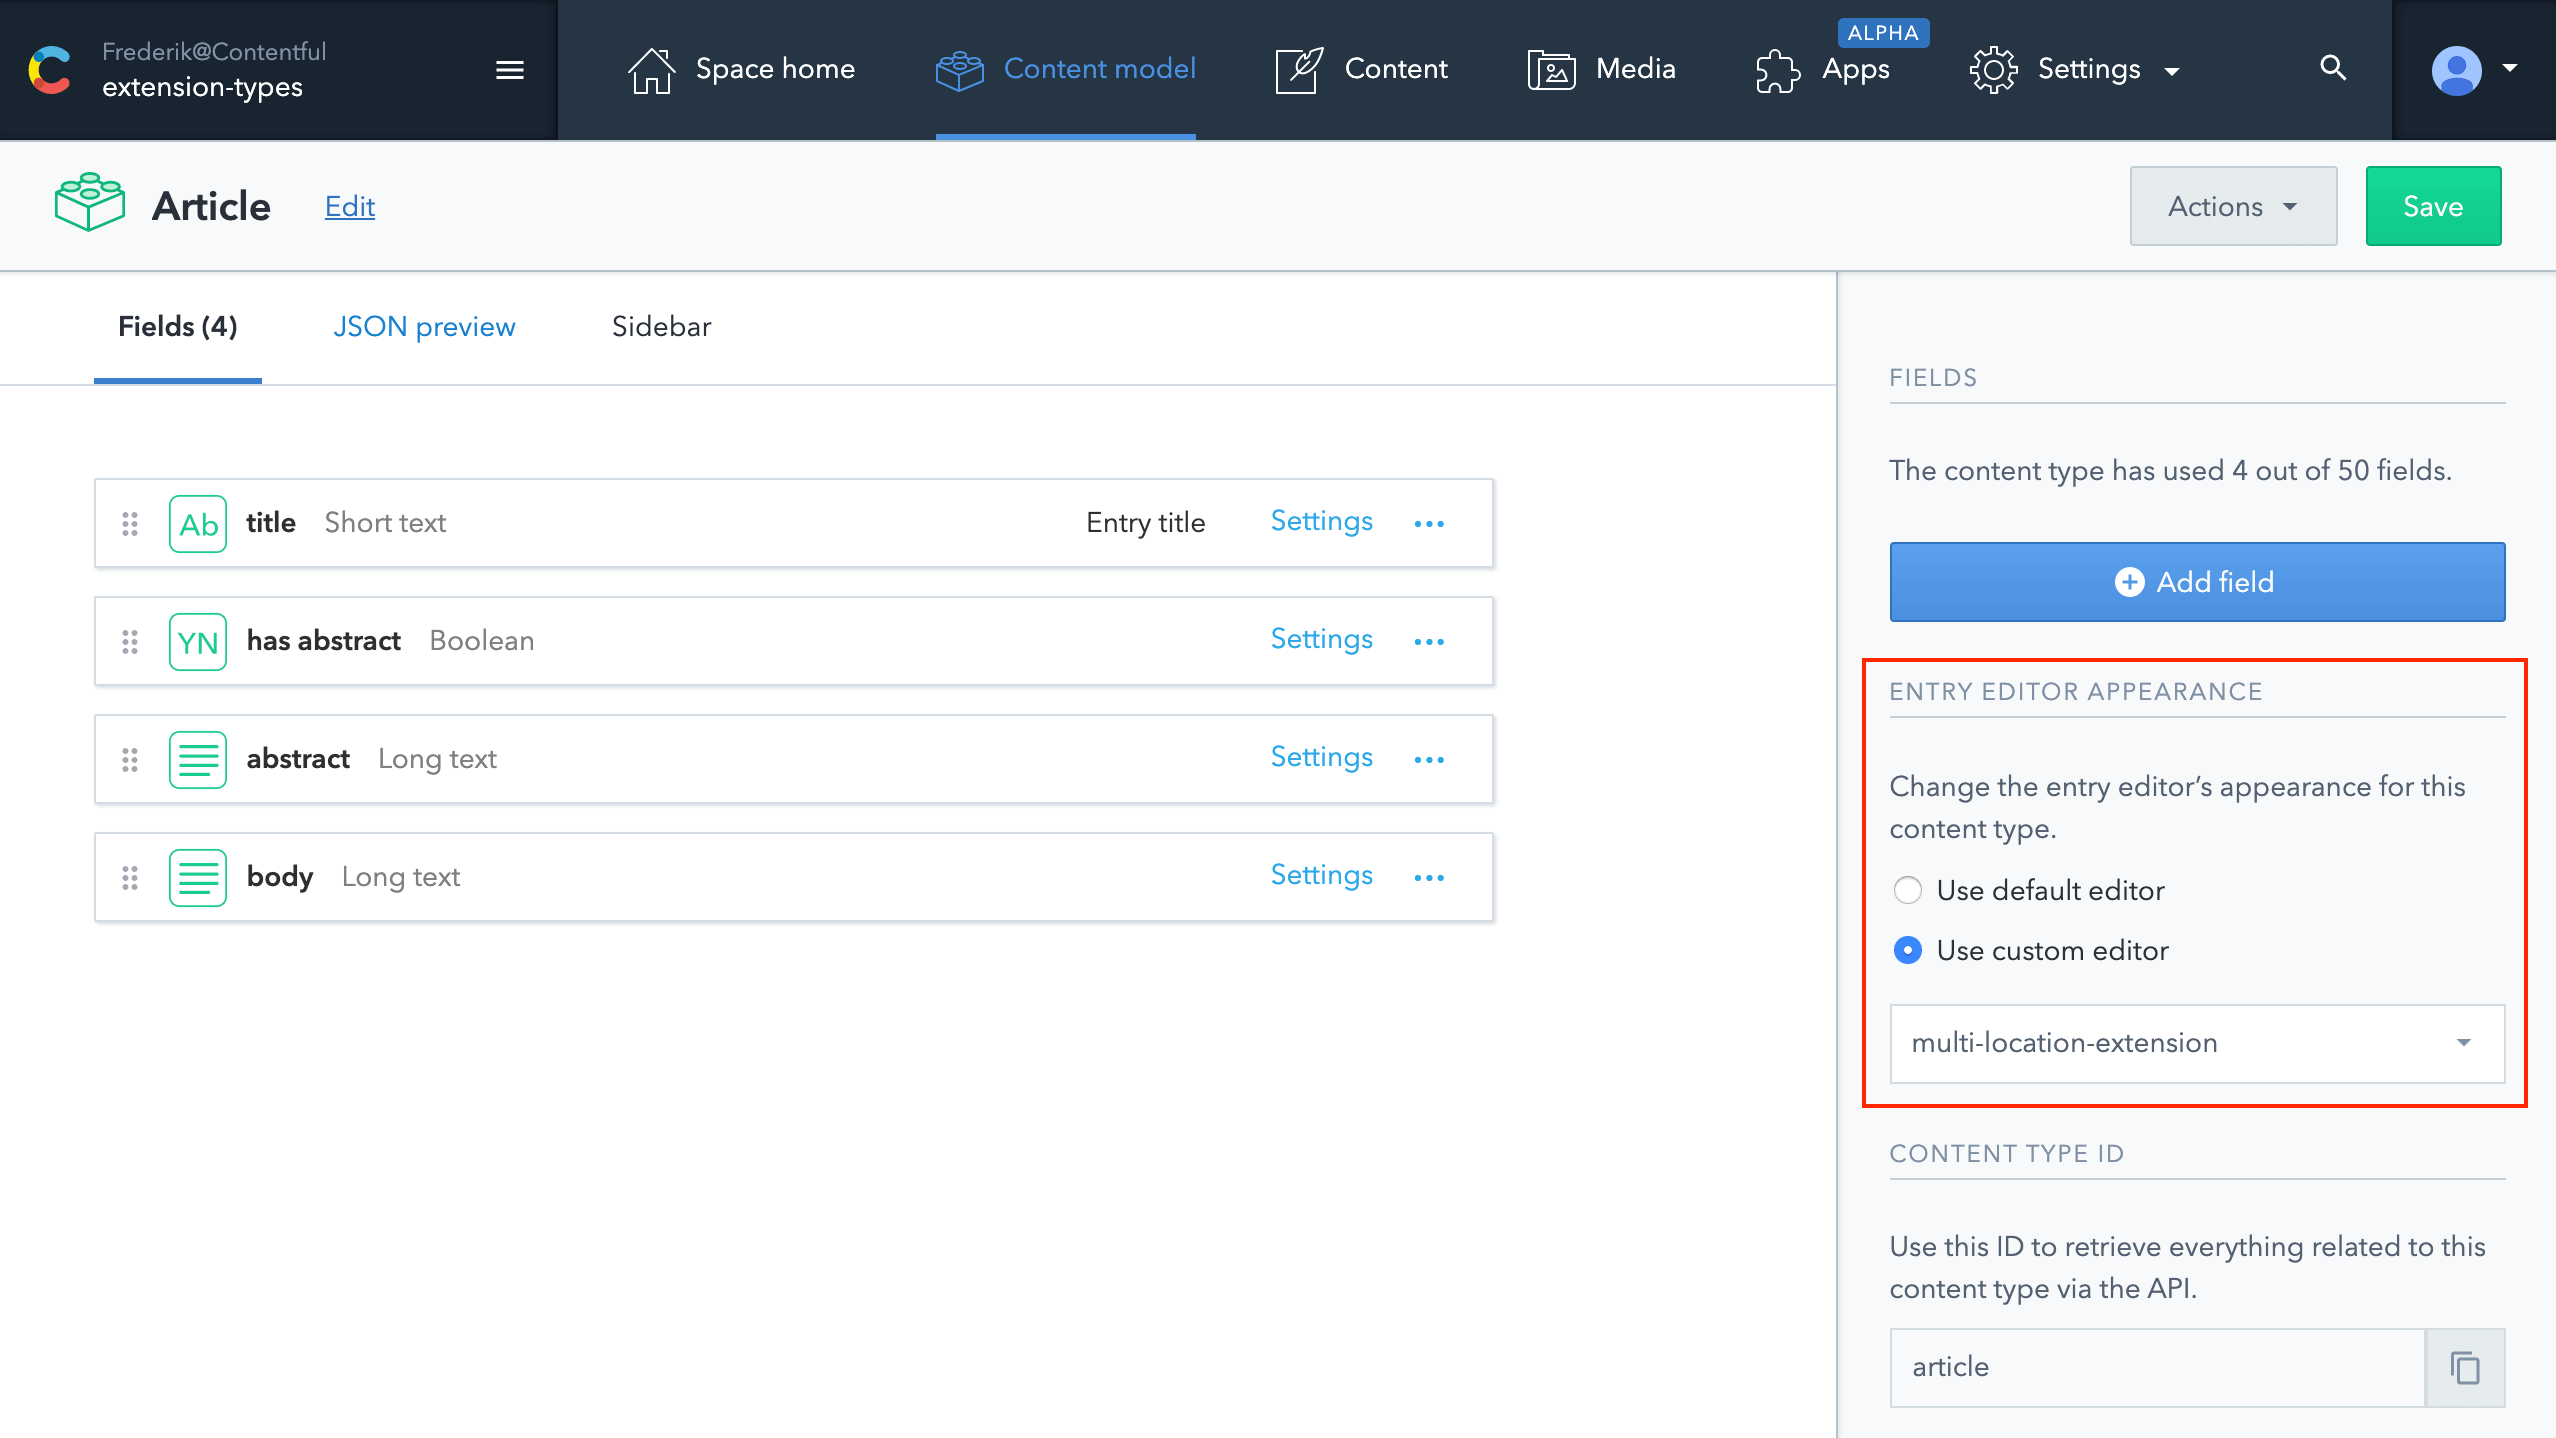
Enabling entry extensions
In the Contentful web app
To assign and use entry extensions in the web app, navigate to content model, then the sidebar of a content type. Find the custom editor, which globally overrides a content type. Select an extension from the dropdown menu which will render the entire experience over the default UI:
In the Content Management API
In the Content Management API, you can control the look and feel of an entry in the Contentful web app via the editor_interface entity:
{
  "controls": [
    {
      "fieldId": "title",
      "widgetId": "singleLine",
      "widgetNamespace": "builtin"
    }
  ],
  "editor": {
    "widgetId": "my-entry-extension",
    "widgetNamespace": "extension"
   }
}
Controls: Used to assign widgets to fields by default
Editor: Overrides controls and assigns one UI extension globally to the entire editor. It’s not necessary to remove the controls as they will be overridden by the existence of editor.
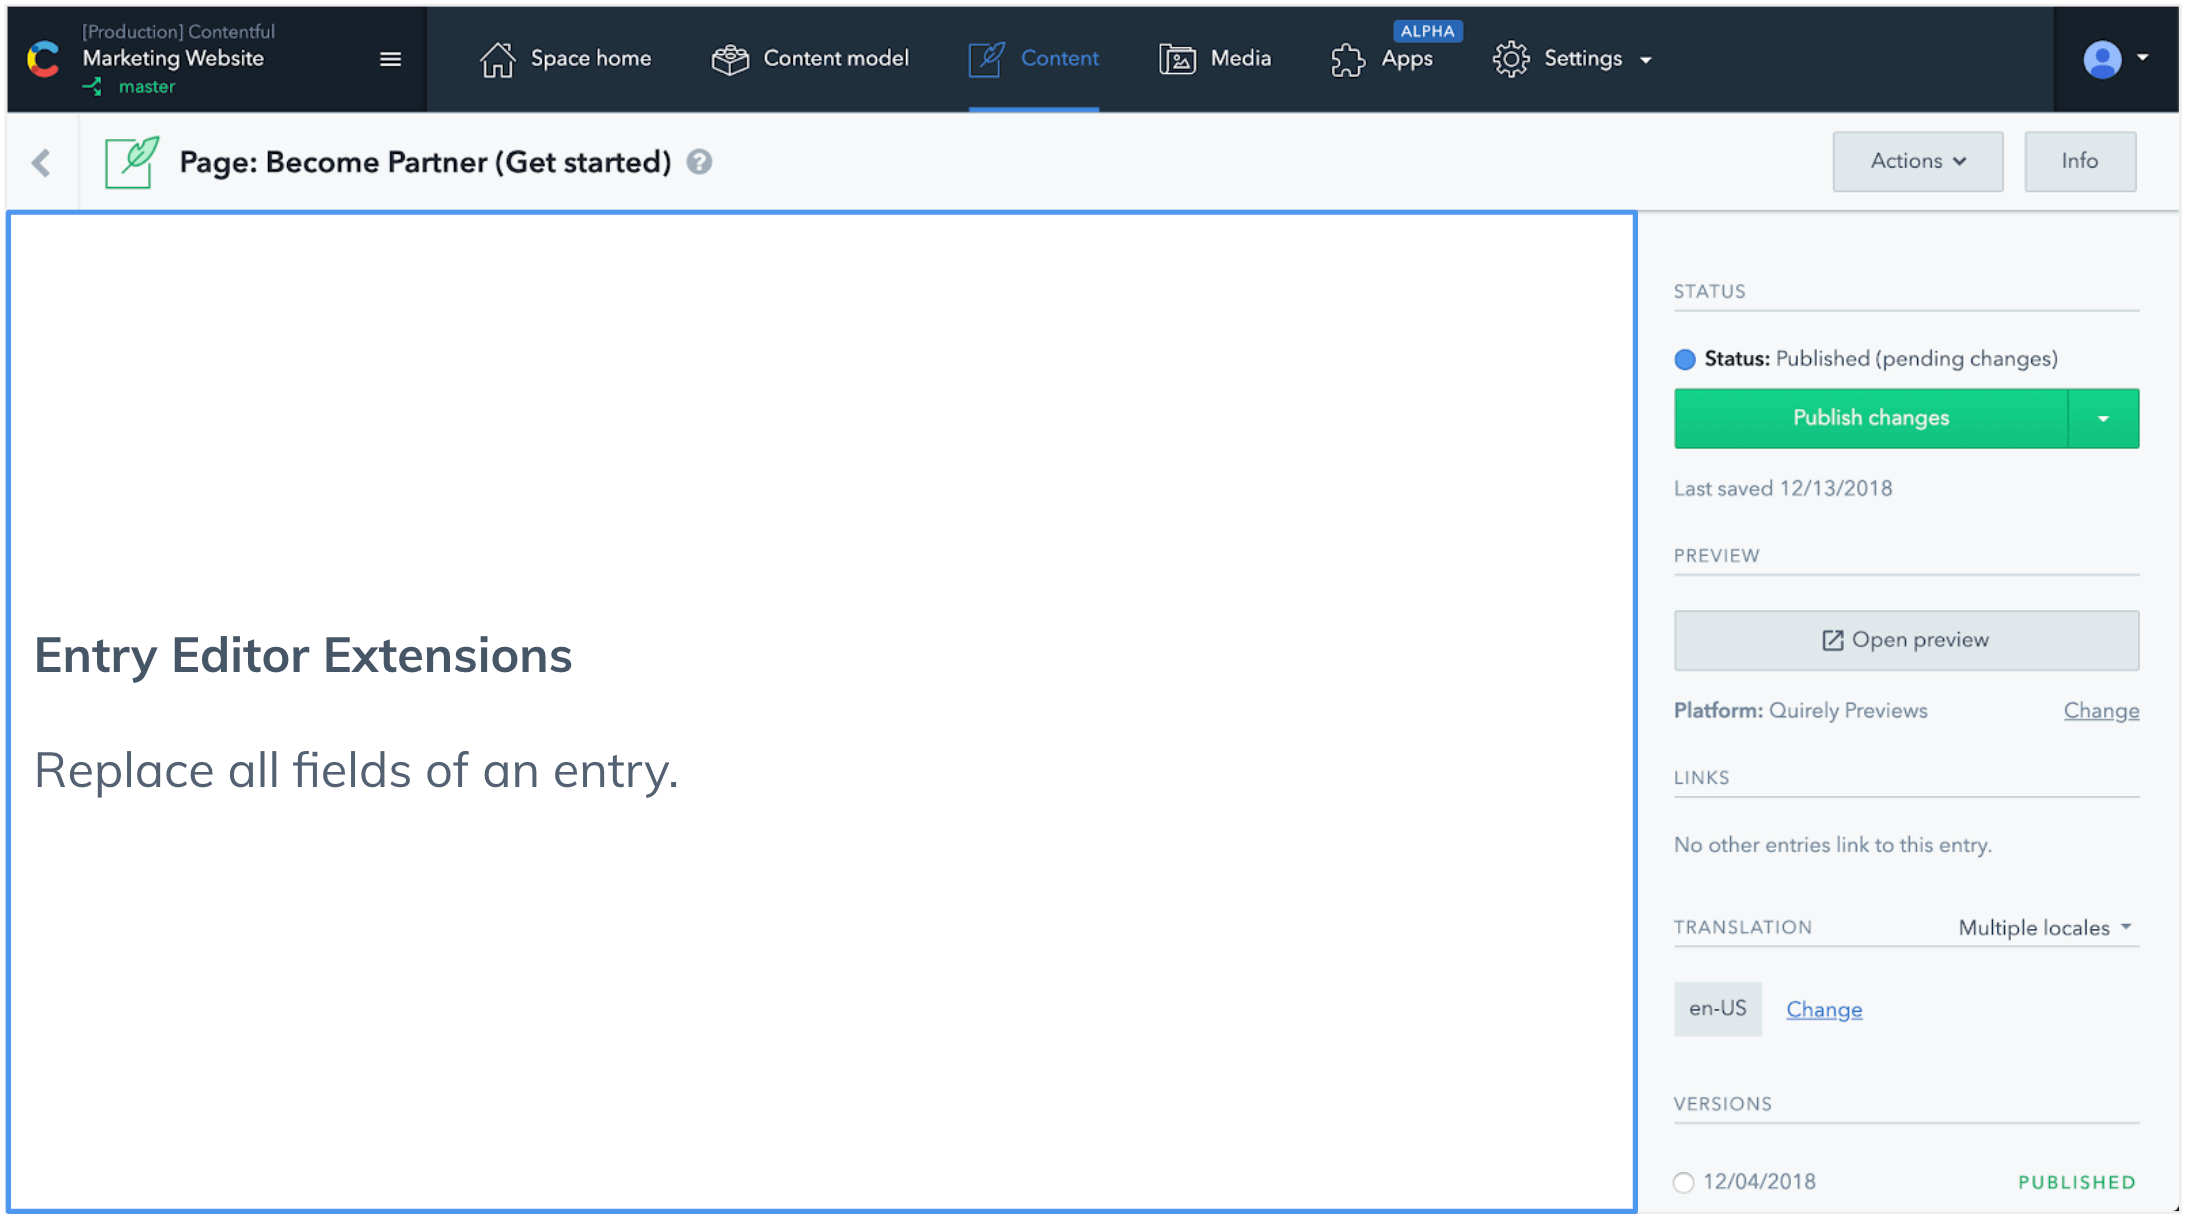
Example: Conditional fields with entry extensions
Creating conditional fields – fields that are hidden and shown depending on a specific criteria – is one common case where entry extensions can be used to customize an editing experience in the web app. This example shows an entry extension used to toggle a long-form text field based on a boolean field “has abstract”.
Once you have cloned the prepared sample extension, create the necessary content type. You can find the used content type in this json file.
Then, run the following commands:
- Install the dependencies of the example with
npm i - Push a development version of the example to your space
npx contentful space use && npm run start
Assign the extension to a content type with the following fields:
hasAbstractof typeBooleanabstractof typeText
Finally, assign entry-editor-extension to the entry in the content modelling section of the web app, in the sidebar under “Entry editor appearance”.
The result should look like this:

Summary
This guide showed how to get started with entry extensions, including use cases, how to build them, and how to assign them to an entry. It’s important to note:
- Entry extensions override the entire editor interface of an entry
- They can be built using the create-contentful-extension CLI either from scratch or using the Forma 36 component library
- They are assigned in the web app under content modeling, or controlled in the Content Management API via the editor_interface entity
Resources
- Full documentation on UI extensions
- Documentation on the create-contentful-extension CLI
- Our design system Forma 36 and how to use it